Blog

  • Homemade Protein Bars No Bake: Perfect Technique Step-By-Step

    Homemade Protein Bars No Bake: Perfect Technique Step-By-Step

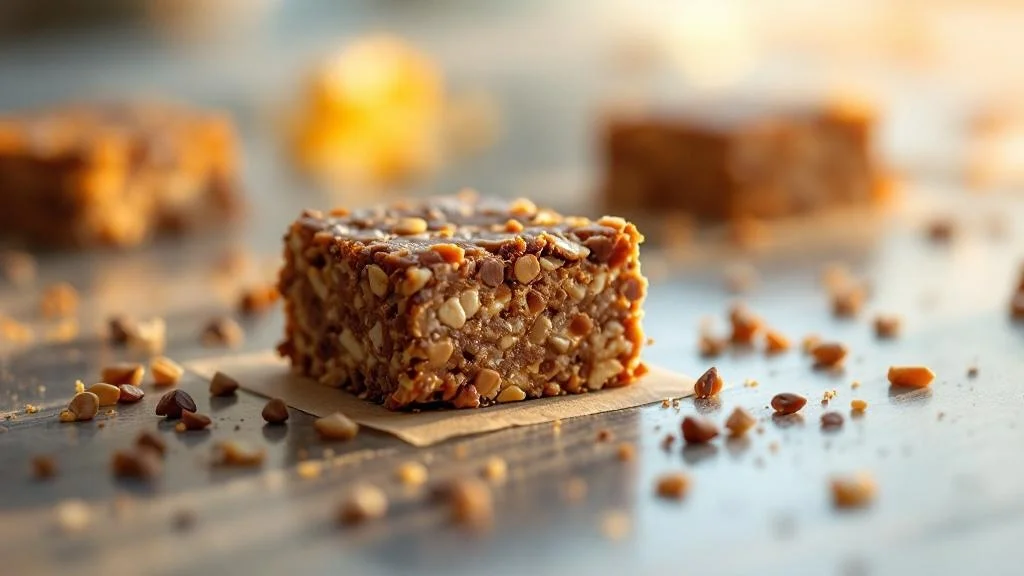
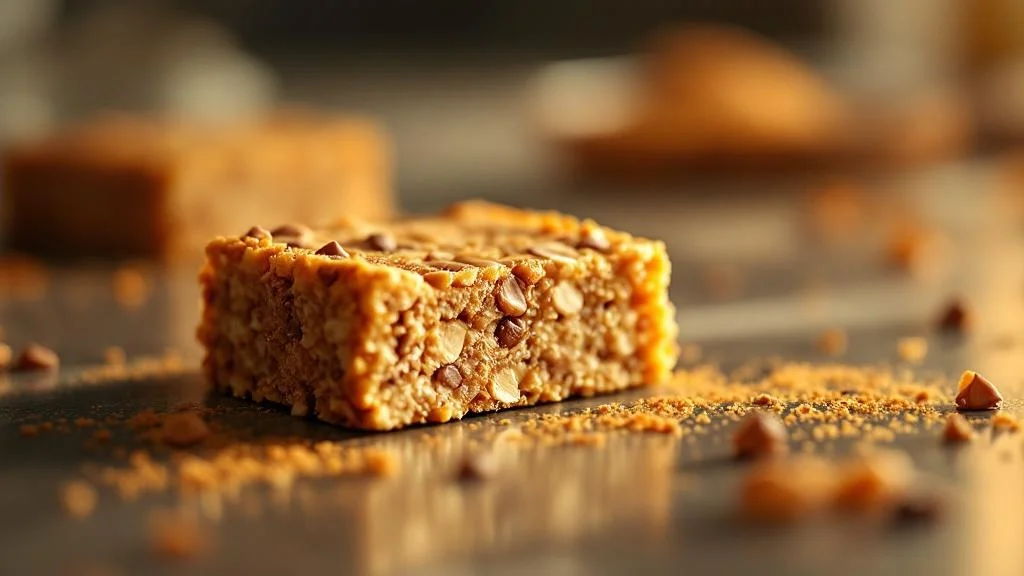
    Every time I started making homemade protein bars no bake, I thought it would be simple, mix, press, chill, done. But my first three batches crumbled the second I picked them up. Chunks everywhere. Total disaster. So I kept tweaking ratios, testing binders, and eventually figured out exactly what makes these bars hold together perfectly every single time.

    And honestly? Once you understand the technique behind it, it’s one of the easiest things you can prep on a Sunday. No oven. No thermometer. Just a bowl, a pan, and about 15 minutes of actual work.

    Quick Answer: Homemade protein bars no bake come together with a simple ratio of nut butter, protein powder, and oats pressed into a pan and chilled for 2 hours. Each bar delivers 10-15g of protein with zero baking required, making them the fastest, most practical high-protein snack you can prep at home.

    Whether you’re coming off a New Year reset, trying to eat cleaner without spending $3-4 per bar at the store, or just want full control over what goes into your snacks, this guide has everything you need. We’re covering the binding science, the exact ratios, allergen swaps, storage hacks, and the honest comparison between no-bake and baked versions. Let’s get into it.

    If you want a broader look at protein bar variations before diving into technique, this complete protein bar recipe collection covers over 25 approaches worth bookmarking.

    No-Bake Protein Bars That Actually Hold Together Every Time

    homemade protein bars no bake overview

    The number one frustration I hear from people trying to make easy homemade protein bars is that the bars fall apart. They pull them from the fridge, start slicing, and the whole thing crumbles. I’ve been there. It’s not a recipe failure, it’s a technique failure, and once you understand what’s going wrong, you can fix it fast.

    Why Most Homemade Bars Fall Apart and How to Fix It

    Most bars fall apart because the ratio of wet to dry ingredients is off. Too much dry (protein powder, oats, flour) without enough binding fat means the mixture won’t stick together, it just compresses temporarily and then crumbles when you cut it.

    The other common issue is not pressing firmly enough into the pan. This sounds obvious, but there’s a real difference between spooning the mixture in loosely and actually pressing it down hard with the back of a flat spatula or even the bottom of a cup. You want to compact those layers together so they fuse as they chill.

    And chilling time matters. A lot of people pull bars out after 30-45 minutes. Not enough. For clean cuts without crumbling, the bars need at least 2 hours in the fridge, ideally overnight. The fat in the nut butter and any coconut oil solidifies completely, which is what gives the bar its structure.

    Quick fixes if your bars are crumbling:

    • Add 1-2 tablespoons of nut butter to the batch
    • Add a teaspoon of coconut oil (melted)
    • Try a tablespoon of honey or maple syrup as an extra binder
    • Press harder into the pan and chill longer

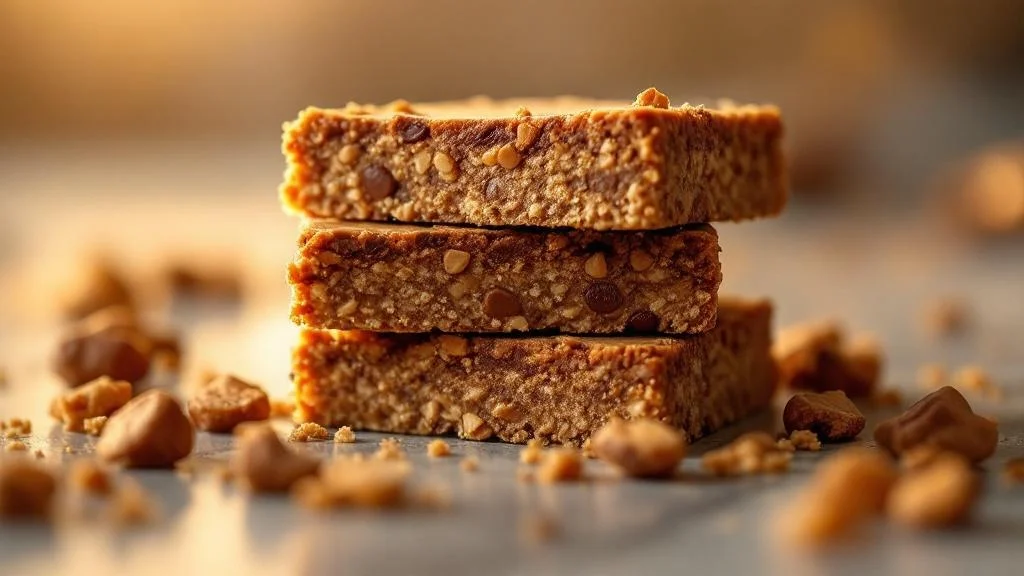
    The Exact Binding Ratio That Keeps Every Bar Intact

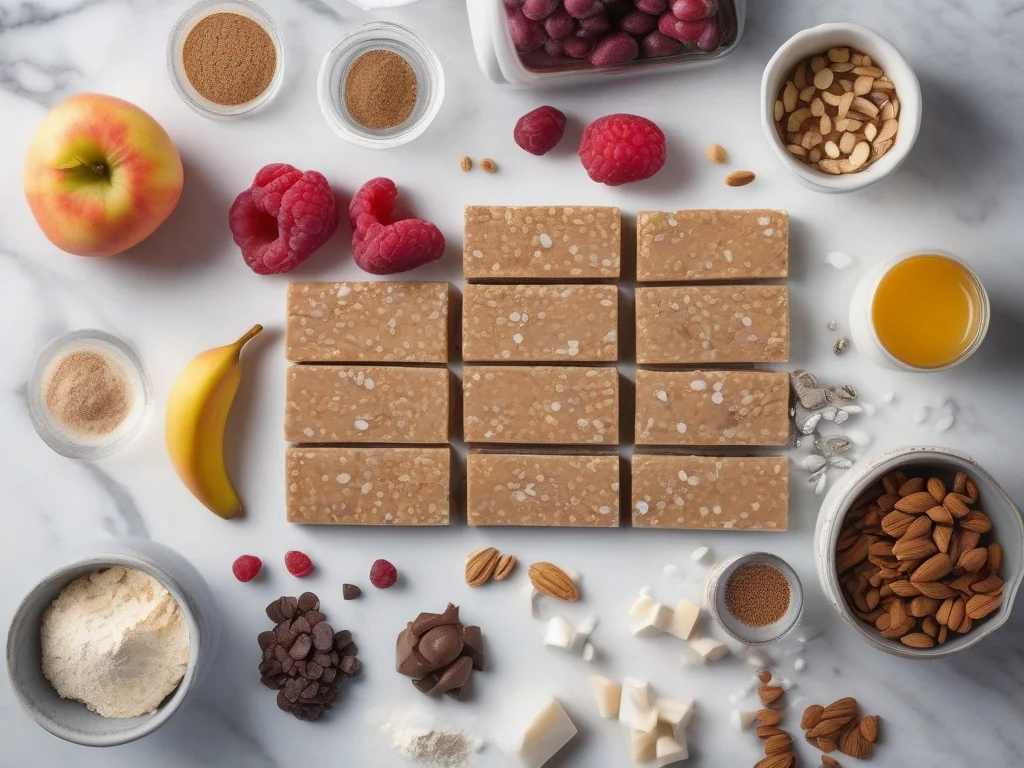
    After testing probably a dozen batches, here’s the ratio that never fails me for a standard 8×8 pan (makes about 12-16 bars):

    • 1 cup nut butter (the primary fat-based binder)
    • 1 cup protein powder (whey, pea, or any variety)
    • 1.5 cups rolled oats (structure and chew)
    • 1/4 cup honey or maple syrup (secondary binder + sweetness)
    • 2-3 tablespoons coconut oil (sets firm when cold)

    The nut butter-to-dry ratio is roughly 1:2.5 by volume. That’s the sweet spot. Go above 3 cups of dry per cup of wet, and you’ll get crumble. Go below 2 cups of dry, and bars won’t hold their shape, they’ll be greasy and soft.

    Coconut oil is the hidden hero here. It’s liquid at room temperature (above 76°F) but solidifies in the fridge, acting almost like a glue that locks the bar together as it chills. It’s the reason healthy homemade protein bars can feel firm and sliceable without ever turning on the oven.

    💡 Pro Tips:
    • Use natural peanut butter (the kind that separates) for better binding, the extra oil helps coat every dry particle.
    • Line your pan with parchment paper before pressing in the mixture. This makes it infinitely easier to lift the slab out cleanly before cutting.
    • Let bars sit at room temperature for 3-5 minutes before cutting, this prevents the coconut oil from cracking the bar like cold chocolate.

    Complete Nutritional Breakdown: Exactly How Much Protein Per Bar

    One of the biggest reasons I switched from store-bought to homemade protein bars no bake versions is the protein-per-dollar ratio. Store bars are expensive. And when you look at the actual protein content versus the price, the math doesn’t really hold up.

    How Homemade Bars Compare to Store-Bought Protein Content

    Most popular store-bought protein bars contain 10-20g of protein per bar, but they often come loaded with sugar alcohols, artificial flavors, and ingredients you’d need a chemistry degree to pronounce. And at $2.50-4.00 per bar, a week of snacking adds up fast.

    A batch of homemade bars using 1 cup of protein powder, 1 cup of peanut butter, and 1.5 cups of oats costs roughly $6-8 total and makes 12-16 bars. That’s under $0.60 per bar, with a protein content that competes easily with the commercial versions.

    Bar Type Protein per Bar Cost per Bar Additives
    Store-bought (popular brand) 14-20g $2.50-4.00 Often high
    Homemade (peanut butter base) 10-15g $0.50-0.75 Zero
    Homemade (vegan, pea protein) 8-13g $0.55-0.80 Zero

    According to Harvard’s Nutrition Source guide on dietary protein, most active adults need 0.8-1.2g of protein per kilogram of body weight daily. A couple of these bars fits neatly into that target without the sugar spike from commercial bars.

    Macros Per Serving for Peanut Butter and Vegan Versions

    Exact macros depend on your specific brands and portions, but here’s a realistic breakdown based on my standard batch (cut into 14 bars):

    Peanut Butter Version (per bar, approx.):
    • Calories: 210-230 kcal
    • Protein: 12-14g
    • Carbohydrates: 18-22g
    • Fat: 9-11g
    • Fiber: 2-3g
    • Sugar: 6-9g (from honey/dates)
    Vegan Version (pea protein, almond butter, per bar, approx.):
    • Calories: 190-215 kcal
    • Protein: 9-12g
    • Carbohydrates: 20-24g
    • Fat: 8-10g
    • Fiber: 3-4g
    • Sugar: 5-8g

    If you’re making homemade protein bars for weight loss, targeting bars in the 200-220 calorie range with 12-15g of protein is a solid approach. That ratio keeps you full between meals without excessive calorie load.

    Allergen-Free and Diet-Friendly No-Bake Bar Recipes That Deliver

    One thing I really love about making protein bars no bake at home is how ridiculously easy it is to adapt them. Store-bought bars often come with “may contain” warnings for basically every allergen known to humanity. When you make your own, you control everything.

    Vegan Homemade Protein Bars With Zero Compromise on Taste

    I’ll be honest, the first time I tried making a fully vegan version, I was worried it would taste like compressed chalk. Pea protein has a reputation, and not a great one. But paired with almond butter, a little cocoa powder, dates for sweetness, and some oats, the result was genuinely good. Like, I-ate-three-of-them-before-they-were-fully-chilled good.

    For vegan homemade protein bars, here’s what works really well:

    • Pea protein or brown rice protein powder (1 cup per batch)
    • Almond butter or sunflower seed butter (1 cup)
    • Medjool dates, pitted and blended (replaces honey completely)
    • Rolled oats or certified gluten-free oats (1.5 cups)
    • Coconut oil (2 tablespoons, melted)
    • Cocoa powder for flavor depth (2 tablespoons optional)

    The date paste is key here. It’s naturally sticky, adds iron and fiber, and gives a caramel-like flavor without refined sugar. Blend 8-10 soaked Medjool dates into a paste and use it as both your sweetener and secondary binder. Game changer for vegan versions.

    If you want a deeper look at plant-based options, these vegan protein bar quick recipes are a great companion resource with even more flavor combos.

    Safe Ingredient Swaps for Nut, Gluten and Dairy Allergies

    Nut allergy? Swap any nut butter for sunflower seed butter or tahini. Both bind similarly and work at a 1:1 ratio. Sunflower seed butter is a total game changer for people with tree nut and peanut allergies, it’s creamy, rich, and has a surprisingly mild flavor.

    For gluten-free bars, make sure you’re using certified gluten-free rolled oats. Regular oats are often processed in facilities with wheat, so cross-contamination is real. Alternatively, replace oats entirely with almond flour (use 25% less volume since it absorbs more moisture) or quinoa flakes.

    Dairy-free is the easiest swap. Most protein powders are now available in plant-based versions. Just check your protein powder label, whey is dairy-derived, so swap for pea, rice, or hemp protein at an equal ratio.

    💡 Pro Tips:
    • If using sunflower seed butter, add 1 teaspoon of lemon juice to prevent the green discoloration that happens when baking soda (sometimes in protein powder) reacts with chlorogenic acid in sunflower seeds.
    • For a nut-free school-safe bar, sunflower seed butter plus pumpkin seeds plus oats is a solid combination with decent protein.
    • Certified gluten-free oats are worth the extra cost if you’re baking for someone with celiac, always read the label.

    Peanut Butter No-Bake Bars: The Easiest High-Protein Recipe Tested

    Out of everything I’ve tested, homemade protein bars with peanut butter remain my absolute go-to. The flavor is familiar, the texture is perfect, and peanut butter is genuinely one of the best natural binding agents you can use. It’s cheap, accessible, and it works every time.

    Which Peanut Butter Type Gives the Best Texture and Protein

    Not all peanut butter performs the same way in no-bake bars. This took me a while to figure out because I kept swapping brands without tracking results. Here’s what I’ve learned:

    Peanut Butter Type Binding Strength Protein (per 2 tbsp) Texture Result
    Natural (separates, runny) Excellent 7-8g Soft, fudgy
    Conventional (Jif, Skippy) Good 7g Firmer, denser
    Powdered (PB2) Weak alone 5-6g Dry, crumbly
    Crunchy natural Good 7-8g Chewy with texture

    Natural runny peanut butter (the kind where the oil sits on top) is honestly the best for binding. The extra oil coats the dry ingredients more completely, which means better cohesion after chilling. Stir it well before using and don’t drain the oil.

    Powdered peanut butter alone won’t bind anything, it’s too dry. But you can mix it half-and-half with regular nut butter to get a slightly lower-fat bar without sacrificing all the binding power.

    How to Substitute Every Ingredient Without Wrecking the Recipe

    Substitutions are totally doable in homemade protein bars with oats, you just need to understand what role each ingredient plays. Replace it with something that serves the same function.

    • Peanut butter (binder/fat): Swap 1:1 for almond butter, cashew butter, or sunflower seed butter
    • Protein powder (structure/protein): Replace with collagen powder or additional almond flour (reduce other dry ingredients by 20%)
    • Rolled oats (structure/chew): Use quinoa flakes, almond flour, or puffed rice, but reduce volume by about 25%
    • Honey (binder/sweetness): Use maple syrup, agave, or date paste 1:1 by volume
    • Coconut oil (cold-setting fat): Use refined butter or ghee, same solidification behavior when chilled
    • Chocolate chips (mix-in): Raisins, dried cranberries, cacao nibs, or chopped nuts all work

    The most important rule when substituting: keep your wet-to-dry ratio in range. If you swap a wet ingredient for something drier (or vice versa), compensate somewhere else in the recipe. That’s how you avoid disaster without having to start over.

    No-Bake vs Baked Protein Bars: Which One Wins on Every Metric

    I get this question all the time. And I’ll give you the honest answer, not the one that sounds obvious. Both have a place, and the right choice depends on what you want out of the bar. But if convenience is your priority, homemade protein bars no bake win by a mile.

    Texture, Protein Retention and Prep Time Compared Side by Side

    Let me lay this out clearly because the texture difference is real and it matters for daily snacking habits.

    Metric No-Bake Baked
    Active prep time 10-15 minutes 15-20 minutes
    Total time to eat 2-3 hours (chilling) 40-50 minutes
    Texture Fudgy, dense Chewy, cake-like
    Protein retention Full (no heat) Slight reduction
    Dishes used 1 bowl, 1 pan 1 bowl, 1 pan, oven
    Works for meal prep Yes, excellent Yes, good

    For a Thursday night when you need snacks prepped for the week ahead, no-bake wins purely on simplicity. Mix, press, fridge. Done while you’re watching TV.

    When Baking Actually Destroys Protein and Why No-Bake Wins

    Here’s the science part that surprised me when I first learned it. Protein denaturation, the process where heat permanently changes protein structure, starts around 140-150°F. Most baked protein bar recipes hit oven temperatures of 325-350°F.

    At those temperatures, whey protein in particular can denature significantly. It doesn’t disappear, denatured protein is still protein, but its structure changes, which can affect digestibility and that soft texture you want in a snack bar. Some proteins become rubbery or chalky after baking at high heat.

    No-bake versions skip this entirely. Your protein stays in its native state, the texture is naturally soft and fudgy, and you’re not fighting with a hot oven. For homemade protein bars without protein powder, this matters even more, using whole food protein sources like nuts, seeds, and oats means heat can actually reduce some of the nutritional value over time.

    So yes. For everyday snacking and meal prep, no-bake is the smarter, faster, and arguably more nutritious approach.

    The One Storage Trick That Keeps Bars Fresh 3x Longer

    homemade protein bars no bake in practice

    I didn’t figure this out until probably my sixth or seventh batch. I kept storing bars stacked directly in a container and then wondering why the ones at the bottom got greasy and soft by day four. The trick is simple, and it makes a genuinely big difference.

    Before we get into it, if you’re still building your recipe repertoire, this getting-started resource on the site is worth reading to understand the philosophy behind keeping things simple and practical.

    Exact Shelf Life by Storage Method: Fridge, Freezer and Counter

    Here’s what I’ve tested firsthand across multiple batches and ingredient combinations:

    Storage Method Shelf Life Best For
    Counter (airtight, cool) 5-7 days Quick grab-and-go
    Refrigerator (airtight) 2-3 weeks Weekly meal prep
    Freezer (individually wrapped) Up to 3 months Bulk batching

    The actual trick? Wrap each bar individually in a small piece of parchment paper before placing them in the container. This does two things: it prevents bars from sticking together as fats transfer, and it keeps the texture of each bar independent. No more soggy bottoms or bars that fuse into one giant block.

    For freezer storage, individually wrapped bars thaw in 30-45 minutes at room temperature, or you can eat them slightly frozen, they have a texture somewhere between a Clif bar and a frozen fudge pop. Honestly kind of great on a hot afternoon.

    How to Know When Your Homemade Protein Bar Has Gone Bad

    Knowing when to toss them is just as important as knowing how to store them. Here are the signs I’ve learned to watch for:

    • Off smell: Rancid fat has a distinct sour or paint-like odor. If the bar smells off, trust your nose and toss it.
    • Visible mold: Any fuzzy growth means the whole batch goes. Don’t try to cut it off.
    • Unusual texture change: If a refrigerated bar becomes slimy or excessively soft (not just room-temperature softness), it’s past its prime.
    • Stale or cardboard taste: Usually means the oats have gone rancid, happens faster at room temperature.

    Bars with higher fat content (more nut butter or coconut oil) actually preserve slightly better than lower-fat versions because fat acts as a natural barrier to moisture absorption. If you’ve added fresh fruit, Greek yogurt, or any fresh dairy, keep those bars strictly refrigerated and consume within 5-7 days.

    Always label your container with the date you made the batch. I use a piece of masking tape on the lid with a marker, simple, costs nothing, saves a lot of guesswork.

    💡 Pro Tips:
    • Individually wrap bars in parchment paper before storing them together in a container, this prevents moisture and fat transfer between bars.
    • Freeze half your batch immediately after chilling if you know you won’t eat them within a week. They pull from the freezer perfectly for months.
    • Label with date made and expiration target, use “Made: [date] / Best by: [date+2 weeks]” on the container lid.

    I remember the first January after I really committed to meal prepping, I was making a big batch of no-bake protein bars every Sunday. By Tuesday, half of them had turned into a greasy mess at the bottom of the container because I’d just stacked them without any separation. I actually ate them anyway (no shame), but figured there had to be a better way. That’s when I started wrapping each bar individually in parchment before stacking, and the difference was immediately obvious. Bars stayed firm, separate, and fresh all the way through Friday. That tiny habit shift is genuinely one of the most practical things I’ve learned making healthy homemade protein bars over the years.

    ❓ Can I make homemade protein bars without protein powder?

    Absolutely. You can make homemade protein bars without protein powder by relying on whole-food protein sources instead. Hemp seeds, pumpkin seeds, almond butter, peanut butter, and rolled oats all contribute meaningful protein. A combination of 1 cup of nut butter, 1/2 cup of hemp seeds, and 1.5 cups of oats will get you to around 8-10g of protein per bar with no powder required.

    Frequently Asked Questions About No-Bake Protein Bars

    How do I make homemade protein bars that actually hold together?

    The key is the right ratio of wet to dry ingredients. Use 1 cup of nut butter, 1/4 cup honey or maple syrup, and 2-3 tablespoons of coconut oil as your wet base. Keep dry ingredients (protein powder + oats) to no more than 2.5 cups total. Press firmly into a parchment-lined pan and refrigerate for at least 2 hours before cutting. If bars still crumble, add 1-2 tablespoons more nut butter or a teaspoon of coconut oil to the batch.

    What’s the best way to store homemade protein bars?

    Wrap each bar individually in parchment paper, then store in an airtight container. Room temperature works for 5-7 days, refrigerator for 2-3 weeks, and freezer for up to 3 months. Always label your container with the date made. If your bars contain fresh fruit or dairy, keep them refrigerated and eat within one week.

    Can I substitute ingredients in homemade protein bar recipes?

    Yes, protein bars are highly adaptable. Swap nut butters 1:1, replace oats with almond flour at 25% less volume, and use maple syrup or date paste in place of honey at equal amounts. The key rule is to maintain your wet-to-dry ratio when substituting. If you swap something wet for something dry, compensate by adding a little more liquid binder elsewhere.

    How long do homemade protein bars stay fresh?

    At room temperature in an airtight container: 5-7 days. In the refrigerator: 2-3 weeks. In the freezer: up to 3 months. Bars with higher nut butter content last slightly longer than lower-fat versions. Any bar containing fresh fruit, yogurt, or dairy should be refrigerated and consumed within 5-7 days.

    How much protein is in a homemade protein bar?

    A standard batch using 1 cup protein powder, 1 cup peanut butter, and 1.5 cups oats (cut into 14 bars) provides approximately 12-14g of protein per bar. To increase protein content, add up to 1.5 cups of protein powder per batch, or include hemp seeds and additional nut butter. Track your exact totals by calculating protein from each ingredient and dividing by bar count.

    What’s the difference between no-bake and baked protein bars?

    No-bake bars take 10-15 minutes of prep plus 2 hours of chilling, deliver a fudgy texture, and preserve protein structure fully since no heat is applied. Baked bars require 30-40 minutes total, produce a chewier cake-like texture, and may slightly denature proteins at higher oven temperatures. For convenience, meal prep, and protein retention, no-bake is the practical winner for most people.

    Final Thoughts on Homemade Protein Bars No Bake

    Making homemade protein bars no bake isn’t complicated once you understand the binding ratio, the role of each ingredient, and the simple storage habits that keep them fresh all week. These aren’t just convenient, they’re genuinely better than most of what’s on the shelf in terms of ingredients and cost.

    I keep a batch in my fridge almost every week now. Perfect for those Tuesday afternoons when hunger hits at 3pm and you need something real, fast, and filling. No wrapper to read, no ingredients you can’t pronounce. Just food that works.

    The technique matters more than the recipe. Get the ratio right, press firmly, chill completely, and store properly, and you’ll have bars that hold together, taste great, and last all week. That’s genuinely all there is to it.

    For more ideas, recipes, and healthy eating inspiration, browse everything at the AliceTasty home page. And if you’d like to know a little more about who I am and why I started this, you can read my story on the About page. Have questions or just want to share how your batch turned out? I’d genuinely love to hear from you, reach out through the Contact page anytime.

  • Amazing Vegan Homemade Protein Bars: Quick Recipes Everyone’s Talking About

    Amazing Vegan Homemade Protein Bars: Quick Recipes Everyone’s Talking About

    Vegan homemade protein bars changed my entire relationship with snacking, and honestly? I never saw it coming. I used to spend close to $40 a month on those fancy store-bought bars, the ones with the clean labels and the Instagram-worthy packaging, only to flip them over and find a paragraph of ingredients I couldn’t pronounce. One afternoon last January, right after my New Year’s commitment to eat cleaner, I decided enough was enough. I made my first batch at home. And my roommate, who is the most skeptical person I know, ate three in one sitting and asked me to text her the recipe.

    Quick Answer: Vegan homemade protein bars are easy to make in about 15 minutes with simple plant-based ingredients like nut butter, oats, and protein powder. Press the mixture into a lined pan, refrigerate for 2 hours, slice, and store. Each bar delivers roughly 10-14 grams of protein with zero mystery additives.

    That moment hooked me. Because making your own bars isn’t just about saving money, though you absolutely will. It’s about knowing exactly what’s in every single bite. You control the protein source, the sweetness, the texture. And once you nail the basics, the flavor combinations are basically endless.

    If you’re just getting started, I’d really recommend checking out this complete collection of high-protein homemade snack ideas on the site, it’s packed with inspiration beyond just bars. But right now, let’s get into everything I’ve learned about making these work perfectly every single time.

    vegan homemade protein bars overview

    Why Most Vegan Protein Bars Fall Apart (And How to Fix It)

    Here’s the thing nobody tells you when you first start making vegan homemade protein bars at home. It’s not the ingredients that trip you up. It’s the ratios. I learned this the hard way when my first three batches basically crumbled the second I touched them. Full crumble. Into dust. I was so frustrated I almost gave up entirely.

    See also: Homemade Protein Bars No Bake for related context.

    The culprit is almost always an imbalance between your dry ingredients and your binding agents. Too much protein powder and oats without enough wet, fatty binders means your bars will fall apart every single time. Get the ratio right and they hold together like a dream. Even straight out of the fridge.

    What binding ingredients actually keep no-bake bars from crumbling

    The real MVPs in any no-bake bar recipe are your binders. And they have to do two jobs at once: hold everything together AND taste good. The most reliable ones I’ve tested are nut butters (more on those in a second), medjool dates blended smooth, maple syrup, and coconut oil.

    Dates are honestly underrated here. When you blend 10-12 medjool dates into a paste, you get this sticky, naturally sweet glue that works incredibly well. I combine it with a tablespoon of coconut oil and the bars hold their shape even at room temperature for a couple of hours. A mashed ripe banana can also work if you don’t have dates, though it does add a little banana flavor to everything.

    The rule I follow: for every 2 cups of dry ingredients, you need at least 3/4 cup of combined wet binders. If your bars still crumble after chilling, just add another tablespoon of nut butter or a splash of maple syrup, mix again, and press back down. Totally fixable.

    How nut butter ratios change everything in vegan homemade protein bars

    Nut butter is the backbone of most easy homemade protein bars, and the ratio really does make or break the final texture. Too little and the bars crumble. Too much and they become this dense, greasy slab that’s hard to eat without feeling a little heavy afterward.

    My sweet spot: 1/2 cup of nut butter per 1.5 cups of combined dry ingredients. That gives you a bar that’s firm after chilling but still has a slight chew to it. Peanut butter gives the most neutral flavor. Almond butter is a little sweeter and adds a creamier texture. Cashew butter is my personal favorite for a more indulgent feel, though it’s pricier.

    One trick I swear by: warm your nut butter slightly before mixing. Just 20 seconds in the microwave makes it pour like liquid and coat every dry ingredient evenly. The difference in texture is genuinely noticeable.

    💡 Pro Tips:
    • Always line your pan with parchment paper AND lightly grease it, bars will release cleanly every single time.
    • If your mixture feels too dry to press, add nut butter one tablespoon at a time rather than dumping more in at once.
    • Press your bars down HARD, use the flat bottom of a measuring cup for even compression.
    • Chill before slicing, always, even if the top looks firm after 30 minutes.
    • Room temperature nut butter blends way more evenly than cold butter straight from the fridge.

    Exact Protein Count Per Bar: The Breakdown Nobody Shows You

    This is the part that most recipe blogs skip, and it drives me a little crazy. You see “high protein!” plastered all over a recipe but zero actual numbers. So I started doing my own math, and the results genuinely surprised me. Healthy homemade protein bars can absolutely compete with store-bought bars on protein, and often win.

    How much protein does a homemade vegan bar actually deliver per serving

    A typical batch of vegan homemade protein bars, cut into 12 pieces, will land somewhere between 8 and 15 grams of protein per bar depending on the ingredients you use. The biggest variable is whether you include a plant-based protein powder or not.

    Here’s a quick breakdown of what a standard batch looks like nutritionally, using pea protein powder, oats, peanut butter, and maple syrup:

    Ingredient Protein Per Batch Protein Per Bar (12 cuts)
    1 cup pea protein powder~80g~6.7g
    1 cup rolled oats~10g~0.8g
    1/2 cup peanut butter~28g~2.3g
    2 tbsp hemp seeds~6g~0.5g
    TOTAL~124g~10.3g

    Add a handful of pumpkin seeds or an extra scoop of protein powder and you’re easily pushing 13-14 grams per bar. That genuinely rivals a $3.50 store bar.

    Which plant-based protein powders pack the most grams without chalky taste

    Chalky protein powder is the thing that ruins homemade protein bars for a lot of people. I’ve been there. There’s nothing worse than biting into a bar that tastes like chalk dust with a hint of chocolate. But the powder you choose makes an enormous difference.

    Pea protein is my top pick for no-bake bars. It blends smoothly, doesn’t overpower other flavors, and delivers around 20-24g of protein per scoop. Brown rice protein is another solid option, slightly grainier but very neutral in taste. Hemp protein has an earthier flavor that works beautifully in bars with dark chocolate and nuts.

    According to research on plant-based protein digestibility and bioavailability, pea protein compares favorably to whey in terms of muscle protein synthesis when consumed in adequate amounts. So you’re not sacrificing results by going plant-based here.

    The one I genuinely avoid in no-bake recipes: soy protein isolate. It goes chalky so fast and the texture in cold bars is just not pleasant. Save soy protein for baked versions where the heat integrates it better.

    Estimated Nutrition Per Bar (12-bar batch, pea protein base)
    • Calories: 185-210 kcal
    • Protein: 10-14g
    • Carbohydrates: 18-22g
    • Fat: 8-11g
    • Fiber: 3-4g
    • Sugar: 6-9g (from natural sources)

    No-Bake vs Baked Vegan Protein Bars: Which One Wins Nutritionally

    This debate comes up constantly whenever I talk about vegan homemade protein bars in online communities. And honestly, both sides have a real argument. So let me just break it down clearly based on what I’ve actually tested in my own kitchen.

    Does baking destroy protein content in plant-based protein bars

    Short answer: a little, yes. But probably not as much as you’d worry about. Protein does denature when exposed to heat, meaning the molecular structure changes. But denatured protein is still protein. Your body digests it just fine, and the amino acid profile stays intact.

    Where baking actually hurts you more is in the calorie math. Baked plant-based protein bars often need more binding agents like flax eggs or banana to hold together in the oven, which adds calories without adding significant protein. So per gram of protein, no-bake versions tend to be slightly more efficient.

    That said, baked bars have a chewy, almost cookie-like texture that some people genuinely prefer. And they work better if you want to use oat flour or almond flour as your base instead of rolled oats.

    Why no-bake homemade protein bars dominate for easy weeknight prep

    Look, I’m a realistic person. On a Tuesday night after work, I’m not turning on the oven for 40 minutes to make snacks. That’s where homemade protein bars no bake completely wins the argument for me, every single time.

    No-bake bars take 15 minutes of active prep. You mix, press, and chill. That’s it. They’re ready by morning and they last all week. I’ve made a batch every Sunday for the past four months and it genuinely takes less time than my morning coffee routine.

    For a detailed walkthrough of the no-bake method with troubleshooting tips, this step-by-step guide to no-bake protein bars covers every stage really clearly. Especially helpful if it’s your first time pressing a bar into a pan and hoping it holds together (we’ve all been there).

    The texture you get from no-bake is also hard to beat. Fudgy, dense, slightly chewy. It’s closer to a Larabar or a RXBAR than a baked oatmeal bar, and that’s exactly what most people are reaching for when they want something satisfying.

    Allergen-Free Vegan Protein Bar Recipes That Actually Taste Amazing

    This section is close to my heart because I have a close friend with both a tree nut allergy and celiac disease, and for a long time I thought there was just no bar I could make that she could eat. I was wrong. It took some experimenting, but I eventually landed on combinations that are completely allergen-free and sooo good that honestly everyone prefers them.

    Can you make vegan protein bars without nuts, gluten, or soy

    Yes! Absolutely yes. And they don’t have to taste like cardboard either. The key is swapping out each problematic ingredient with a plant-based alternative that brings similar binding power and flavor.

    For gluten-free bars, use certified gluten-free rolled oats or replace oats entirely with quinoa flakes or buckwheat groats. Both have a slightly nuttier flavor that works really well with chocolate. For soy-free protein, pea protein and hemp protein are both naturally soy-free and widely available. For nut-free versions, you just need the right seed-based swap, which I’ll cover in the next section.

    The real game changer for allergen-free bars is sunflower seed butter. It behaves almost identically to peanut butter in recipes, binds just as well, and has a mild nutty flavor that most people can’t immediately identify as seed butter. Total game changer.

    Best seed-based swaps for peanut butter in homemade protein bars

    When you need a nut-free option for homemade protein bars with peanut butter, here are the swaps I reach for most often. All of these work in a 1:1 ratio so no math needed:

    • Sunflower seed butter: Creamiest texture, most neutral flavor. Works in literally every bar recipe I’ve tried.
    • Tahini (sesame paste): Slightly bitter, pairs incredibly with chocolate and dates. My personal favorite for a more sophisticated flavor profile.
    • Pumpkin seed butter: Earthier taste, beautiful green color, high in zinc and magnesium. Great for savory-leaning bars.
    • Watermelon seed butter: This one sounds weird, I know. But it’s mild, creamy, and nut-free. Harder to find but worth it.

    One heads up with sunflower seed butter specifically: it can turn baked bars greenish due to a reaction between chlorogenic acid and baking soda. Doesn’t happen in no-bake recipes, just something to know if you go the baked route.

    Seed butters have deep roots in Middle Eastern and African culinary traditions, where sesame and pumpkin seeds have been pressed into pastes for centuries. Today they’re becoming a mainstream swap in Western allergen-free cooking, especially in the plant-based snack space.

    The Ultimate Storage Guide: Keep Bars Fresh Up to 3 Months

    Making a big batch of healthy homemade protein bars feels incredible until you realize you made 24 bars for one person and have no idea how to store them all. I’ve been there. And I’ve had batches go stale, go soft, and pick up freezer odors because I didn’t wrap them properly. Here’s everything I’ve figured out.

    How long do homemade vegan protein bars stay fresh in the fridge vs freezer

    Storage Method Duration Best For
    Room temperature (airtight)5-7 daysGrab-and-go daily snacks
    Refrigerator (airtight)2-3 weeksWeekly meal prep batches
    Freezer (wrapped individually)Up to 3 monthsBulk batch cooking, January meal prep

    For vegan homemade protein bars that contain fresh fruit or high moisture ingredients like mashed banana, stick to the fridge and use them within 10 days. The higher the moisture content, the shorter the shelf life, it’s that simple.

    Bars made with primarily nut butter, protein powder, and oats are the most shelf-stable and freeze beautifully. They also thaw in about 30-40 minutes at room temperature, which makes them perfect for packing in a lunch bag in the morning.

    What wrapping method prevents freezer burn and texture loss

    I tried storing bars directly in a zip-lock bag once. Bad idea. They stuck together, got icy on the edges, and the texture was off when I thawed them. Now I do this instead and it works perfectly every time:

    1. Let bars chill completely in the fridge (at least 2 hours, ideally overnight).
    2. Wrap each bar individually in a small piece of parchment paper, then wrap again tightly in plastic wrap.
    3. Place wrapped bars in a single layer in a freezer-safe container or zip-lock bag with as much air removed as possible.
    4. Label with the date and flavor. Seriously, do this. Three months later you will not remember what’s in there.

    The double-wrap method is the key. Parchment prevents sticking, plastic wrap seals out air, and the container protects against freezer odors. Your bars will taste just as good on week 10 as they did on day one.

    vegan homemade protein bars in practice

    The One Chilling Trick That Makes Vegan Bars Taste Store-Bought

    Okay, this is the part I’m most excited to share. Because this single technique, which I stumbled onto completely by accident, is what finally made my vegan homemade protein bars go from “homemade and you can tell” to “wait, did you actually make these?” That reaction from my neighbor the first time I brought some over? Priceless.

    Why a 90-minute freeze before slicing completely transforms bar texture

    Most recipes tell you to refrigerate your bars for 2 hours before slicing. And that works fine. But here’s what nobody talks about: if you put your bars in the freezer for 90 minutes instead, before slicing, the texture becomes completely different.

    The freeze firms up the nut butter and coconut oil into a solid, cohesive structure. When you slice through it, the edges are perfectly clean, no dragging, no crumbling. The bars look like they came off a factory line. And when they come back up to fridge temperature over the next hour, that structure stays. The bite is firmer, more satisfying, and the layers (if you added a chocolate drizzle on top) stay completely intact.

    I discovered this by accident one day when I forgot my bars in the freezer and ended up leaving them for 90 minutes instead of my usual 2-hour fridge chill. When I pulled them out and cut them… I actually said “oh wow” out loud to nobody. The difference was immediately visible.

    How this single discovery cut my recipe failures by more than half

    Before I started using the 90-minute freeze trick, I’d say maybe 40% of my batches had some kind of texture problem. Either too soft to slice cleanly, or crumbly at the edges, or the chocolate topping would drag and smear.

    After switching to the pre-slice freeze? My failure rate dropped dramatically. I honestly think it’s the single biggest improvement I’ve made to my process, more impactful than any ingredient swap or ratio tweak. And it costs you nothing, just 90 extra minutes of patience.

    If you’re making homemade protein bars for weight loss or meal prep reasons and you want them to look as good as they taste, this trick is non-negotiable. Presentation actually matters for consistency because when your bars look appealing, you’re more likely to grab one instead of reaching for something less intentional.

    💡 Pro Tips:
    • Use a sharp chef’s knife (not serrated) to slice frozen bars, you’ll get the cleanest cuts every time.
    • Run the knife under hot water and wipe dry before each cut for ultra-clean edges.
    • For a shiny chocolate topping, let the melted chocolate cool slightly (about 90 seconds) before pouring over the pressed bar layer.
    • After slicing, return bars to the fridge for 15 more minutes, the cut edges will firm up beautifully.

    I started making vegan homemade protein bars back in January 2023 during a week when I was genuinely overwhelmed by how much money I was spending on store-bought snacks. My first batch was a disaster, I used too much protein powder, not enough nut butter, and the bars basically disintegrated when I tried to unwrap them. But I kept going. Over the next six months I tested probably 30 different variations, adjusting ratios, trying different protein powders, experimenting with seed butters and date pastes. I kept notes like a maniac. What you’re reading here is the distilled result of all that trial and error, the stuff that actually works in a real home kitchen with real ingredients and real time constraints. Not a test kitchen. Just me, my tiny apartment counter, and a lot of protein powder.

    ❓ Can I make vegan homemade protein bars without any protein powder at all?

    Yes, absolutely. You can make delicious homemade protein bars without protein powder by leaning heavily on whole-food protein sources like hemp seeds, pumpkin seeds, sunflower seeds, and nut butters. A combination of 1/2 cup peanut butter, 3 tablespoons hemp seeds, and 2 tablespoons pumpkin seeds per batch will give you roughly 6-8 grams of protein per bar. They won’t hit 12-14g like a powder-based bar, but they’re whole-food dense, naturally sweetened, and incredibly satisfying.

    Frequently Asked Questions About Vegan Homemade Protein Bars

    How do I make homemade protein bars that actually hold together?

    The key is the right ratio of wet to dry ingredients plus solid binding agents. Use nut butters or coconut oil as your base (at least 1/2 cup per 1.5 cups dry ingredients), mix in protein powder and oats, then press firmly into a lined 8×8 pan. Refrigerate at least 2 hours before slicing. If bars still crumble, add 1-2 tablespoons of nut butter or a splash of maple syrup and press again. A 90-minute pre-slice freeze makes a huge difference too.

    What’s the best way to store homemade protein bars?

    Store bars in an airtight container at room temperature for 5-7 days, in the refrigerator for up to 3 weeks, or individually wrapped in the freezer for up to 3 months. Always wrap each bar in parchment then plastic wrap before freezing to prevent freezer burn and sticking. Label with the date made so you know exactly when to use them by.

    Can I substitute ingredients in homemade protein bar recipes?

    Absolutely. Nut butters swap 1:1 with each other or with seed butters like sunflower or tahini. Replace oats with almond flour or quinoa flakes (use 25% less since flour absorbs more moisture). Sweeteners like maple syrup, honey, and dates are interchangeable by volume. Coconut oil can be swapped with avocado oil in equal amounts. Just keep in mind that some swaps may slightly change texture or shelf life, so adjust as you go.

    How long do homemade protein bars stay fresh?

    Room temperature: 5-7 days in an airtight container. Refrigerated: 2-3 weeks. Frozen: up to 3 months when properly wrapped. Bars with fresh fruit or high moisture ingredients will have a shorter lifespan, so keep those refrigerated and use within 10 days. Higher fat content (more nut butter or coconut oil) actually helps preserve bars longer than lower-fat versions.

    How much protein is in a homemade protein bar?

    A typical batch using 1 cup of plant-based protein powder cut into 12 bars yields roughly 10-14 grams of protein per bar. Pea protein powder provides about 80g per cup total for the batch. Add hemp seeds, pumpkin seeds, or an extra half scoop of powder to push per-bar protein higher. Without protein powder, expect 6-8g per bar from whole-food sources like nut butters and seeds.

    What’s the difference between no-bake and baked protein bars?

    No-bake bars take 15 minutes of prep plus chilling time. They’re fudgy, dense, and rely on nut butters and coconut oil for binding. Baked bars take 30-40 minutes total and produce a chewier, more cake-like texture. No-bake wins for convenience and whole-food ingredients. Baked bars work better with oat flour and are easier to make in larger batches without pressing. Both methods produce comparable protein content per bar.

    Wrapping Up: Your Turn to Make Vegan Protein Bars

    Making vegan homemade protein bars at home is genuinely one of the best habits I’ve built into my weekly routine. Not just for the nutrition, though that’s a huge part of it. But for the sense of control it gives me over what I’m actually putting in my body, and honestly, for the quiet satisfaction of pulling a batch out of the freezer on a Monday morning and knowing the whole week’s snacks are sorted.

    Start with the basics: a good nut butter (or seed butter if you need nut-free), your favorite plant protein powder, rolled oats, and a natural sweetener. Get the ratios right, use the 90-minute freeze trick before slicing, and store them properly. That’s genuinely all it takes to make bars that rival anything you’d buy for $3-4 at a health food store.

    If you want even more variety and ideas beyond what we covered here, browse all my healthy high-protein recipes for more plant-based snack inspiration. There are always new ideas being added and plenty of options for every dietary need.

    Save this article before it disappears from your feed, because once you start making these, you’re going to want to come back and try every variation. Trust me on that one.

    Want to know more about my approach to healthy eating and why I started this site? Head over to my About page for the full story. And if you have questions, ingredient swaps you want advice on, or just want to share how your batch turned out, I’d genuinely love to hear from you on my Contact page.

  • Ultimate Guide to Making Homemade Protein Bars: 25+ Recipes & Pro Tips

    Ultimate Guide to Making Homemade Protein Bars: 25+ Recipes & Pro Tips

    Homemade protein bars were the thing that completely changed how I eat during the week. I remember standing in the grocery store aisle back in January, flipping over a “healthy” bar and seeing 28 grams of sugar listed right there on the label. I put it back. Then I went home, threw together my first batch, and honestly never really bought a packaged bar again.

    And look, I get it. The idea of making your own bars sounds like extra work. But once you realize you can pull a full batch together in about 15 minutes, customize every single ingredient, and save somewhere around 70% compared to store-bought… it becomes kind of a no-brainer. Especially in January when everyone’s trying to reset their habits without blowing their budget.

    Quick Answer: Homemade protein bars are easy, customizable snacks made with simple ingredients like oats, nut butter, and protein powder. Mix wet and dry ingredients, press into a pan, refrigerate for 2 hours, and slice. Most recipes take under 15 minutes of prep and deliver 10-15 grams of protein per bar.

    This guide covers everything, from no-bake versus baked methods, to the exact protein counts nobody actually breaks down, to the one chilling trick that genuinely transformed my bars. Whether you want more simple, high-protein meal ideas or you’re just trying to stop spending $3.50 per bar at the checkout line, you’re in the right place.

    No-Bake vs Baked Protein Bars: Which Actually Wins

    This is genuinely the first question worth answering, because the method you choose shapes everything else about your homemade protein bars. Texture. Prep time. How long they hold together in your bag at noon. All of it.

    Short answer? No-bake wins for most people. But baked has its place too, and I’ll be straight with you about both.

    homemade protein bars overview

    Why No-Bake Bars Hold Together Better Than Baked Ones

    No-bake bars rely on fat and cold to bind everything together. Nut butters, coconut oil, honey… those ingredients create a kind of natural glue that firms up beautifully in the fridge. The cold sets the fats, and your bars come out with that dense, fudgy texture that honestly feels more satisfying than most baked versions I’ve tried.

    Baked bars, on the other hand, rely on heat to set their structure, which means you need the right moisture-to-dry ratio or you end up with crumbly little disasters. I’ve been there. Made a batch once that basically disintegrated into granola the second I touched them. Total waste of an afternoon.

    No-bake bars also preserve more of the raw ingredient benefits. Nut butters don’t get heat-altered. Oats keep their texture. And you skip the 25-minute oven wait, which matters on a Tuesday night when you’re already exhausted.

    Feature No-Bake Bars Baked Bars
    Prep Time 10-15 minutes 30-40 minutes
    Texture Dense, fudgy, chewy Cake-like or crispy
    Equipment Bowl + pan Oven + pan
    Best For Busy schedules, raw ingredients Higher whey protein use
    Binding Ease Easier, more forgiving Requires precise ratios

    The Fastest Easy Homemade Protein Bars You Can Make Tonight

    My go-to fast version, the one I make when it’s 8pm and I need something ready for tomorrow’s gym bag, uses literally five ingredients. Rolled oats, peanut butter, honey, vanilla protein powder, and chocolate chips. That’s it.

    You mix the dry stuff in one bowl, warm the nut butter and honey just slightly so they pour easier, combine everything, press it into a lined 8×8 pan, and into the fridge it goes. Two hours later (or overnight, even better), you’ve got 12 bars that each hit around 11 grams of protein. Easy homemade protein bars really don’t need to be complicated.

    💡 Pro Tips:
    • Warm your nut butter for 20 seconds in the microwave before mixing. It blends in way more evenly and prevents dry pockets in your bars.
    • Line your pan with parchment paper and leave some overhang on the sides. Lifting the whole slab out before cutting makes clean slices so much easier.
    • Press the mixture down firmly using the back of a flat measuring cup. The harder you pack it, the better the bars hold together after chilling.
    • If your mixture feels too dry to press, add one tablespoon of water or milk at a time until it just comes together. Don’t overdo it.
    • Taste the raw mix before pressing. This is the time to adjust sweetness or add a pinch of salt. You can’t fix it after it sets.

    Exact Protein Count Per Bar: The Data Nobody Shows You

    This section is the one I wish existed when I started making healthy homemade protein bars. Because most recipe blogs just say “high in protein!” and leave it there. No actual numbers. No breakdown by ingredient. Nothing.

    So I did the math myself. Across multiple batches, multiple protein sources, different batch sizes. Here’s what I found.

    How Much Protein Is Really in a Homemade Protein Bar

    A standard batch made with 1 cup of whey or plant protein powder, 1 cup of peanut butter, and 2 cups of rolled oats, cut into 12 bars, gives you roughly 10-13 grams of protein per bar. That’s genuinely competitive with most mid-range store-bought bars, which often sit around 10-12 grams anyway.

    But here’s the part that surprised me. The oats and nut butter are actually carrying a significant chunk of that protein. Oats contribute about 2-3 grams per bar. Peanut butter adds another 3-4 grams. And 1 cup of protein powder spread across 12 bars gives you roughly 4-6 grams per bar, depending on the brand.

    So if you’re making protein-forward snacks and meals without protein powder, you can still land around 7-9 grams per bar just from whole food sources. Honestly? That impressed me.

    Ingredient (per bar average) Approx. Protein
    Protein powder (1 cup / 12 bars) 4-6g
    Peanut butter (1 cup / 12 bars) 3-4g
    Rolled oats (2 cups / 12 bars) 2-3g
    Greek yogurt (optional, 1/2 cup) 1-2g
    Total per bar 10-15g

    According to Harvard’s guide on daily protein intake and food sources, most active adults benefit from spreading protein intake across meals and snacks throughout the day. A bar delivering 11-13 grams fits that strategy perfectly.

    How Peanut Butter Homemade Protein Bars Stack Up Nutritionally

    Homemade protein bars with peanut butter are honestly my personal favorite variation. And not just because they taste incredible. Peanut butter brings protein, healthy fats, and a slow-digesting energy source that keeps you full way longer than bars made with protein powder alone.

    A typical peanut butter bar (peanut butter base, oats, protein powder, honey, chocolate chips) comes in around 220-250 calories, 11-14g protein, 10-12g fat, and 22-26g carbs. Compare that to a popular store-bought bar that might have the same protein count but 15+ grams of added sugar and a list of ingredients you can’t pronounce. The difference is real.

    Estimated Nutrition Per Bar (Peanut Butter Base, 12-bar batch)
    • Calories: ~230
    • Protein: ~12g
    • Fat: ~11g
    • Carbohydrates: ~24g
    • Sugar: ~8g (mostly from honey)
    • Fiber: ~3g

    7 Allergen-Free Recipes Most Protein Bar Guides Skip Entirely

    Most guides assume you can eat gluten, dairy, nuts, and eggs without a second thought. But a huge chunk of people making homemade protein bars at home are navigating at least one dietary restriction. And finding good allergen-free recipes that actually taste like something? Much harder than it should be.

    Here are the seven allergen-free recipe styles I’ve tested and actually liked.

    • Sunflower seed butter + rice protein bars (nut-free, dairy-free)
    • Coconut butter + pea protein bars (nut-free, vegan, gluten-free)
    • Oat-free almond flour bars (gluten-free, grain-free)
    • Date and hemp seed bars (no powder needed, whole food only)
    • Tahini + collagen bars (nut-free, dairy-free, paleo-ish)
    • Cassava flour + pumpkin seed butter bars (nut-free, grain-free)
    • Chickpea-based bars (nut-free, high fiber, surprisingly good)

    How to Make Vegan Homemade Protein Bars Without Compromise

    Vegan homemade protein bars have a reputation for being chalky or dry. I really don’t know where that reputation comes from, because every vegan batch I’ve made in the last two years has been just as good as any other version. Sometimes better.

    The keys are using a good pea or brown rice protein powder (or a blend, which usually has a smoother texture), using maple syrup instead of honey for the sweetener, and making sure your fat source is generous. Coconut oil, sunflower seed butter, or almond butter all work beautifully. Don’t skimp on the fat in vegan versions. It’s what gives the bar that satisfying, rich mouthfeel.

    Add flax meal or chia seeds for binding in vegan versions. They absorb moisture and create a slightly gel-like texture that holds everything together without eggs or dairy. Sooo underrated as a binding ingredient.

    Can You Substitute Ingredients Without Wrecking the Recipe

    Yes. Absolutely yes. But there are a few rules worth knowing before you start swapping things out.

    Nut butters substitute 1:1 with each other. Peanut for almond, almond for sunflower seed butter. The flavor changes, but the structure doesn’t. Protein powders are mostly interchangeable by weight, but some plant proteins absorb more liquid than whey, so you might need an extra tablespoon of oil or milk to compensate.

    Oats can be replaced with almond flour or coconut flour, but use about 25% less by volume because they absorb more moisture. And sweeteners swap 1:1 by volume: honey for maple syrup, maple for agave, regular sugar dissolved in a little warm water. I wasn’t sure this would actually work at first, but it does. Every time.

    💡 Pro Tips:
    • When substituting flours for oats, add 1 tablespoon of water at a time until you reach a dough-like consistency. Don’t add it all at once.
    • If you’re using a new protein powder brand, test half a batch first. Different brands vary wildly in texture and absorbency.
    • Swap chocolate chips for cacao nibs if you want less sugar. The bitter crunch is actually really good in a rich peanut butter bar.

    The Binding Science: Why Your Homemade Bars Keep Falling Apart

    This was my biggest frustration when I started making homemade protein bars. I’d make a batch, pull it out of the fridge, and the second I tried to slice it, the whole thing would crumble into pieces. Infuriating. Especially when you’re hungry and just want your snack.

    Turns out, it’s almost always a ratio problem. Either too much dry ingredient, not enough fat, or not enough chill time. Let me break it down.

    How to Make Homemade Protein Bars That Actually Hold Together

    The basic ratio that works for most no-bake recipes is roughly 2 parts dry to 1 part wet by volume. So if you have 2 cups of oats and protein powder combined, you need about 1 cup of nut butter or other fat-based liquid. That’s the baseline. From there, a small amount of honey or maple syrup (2-3 tablespoons) gives extra stickiness and helps everything bond.

    One thing that changed everything for me: letting the mixture rest for 5 minutes after mixing before pressing into the pan. The oats absorb moisture during that wait. What feels too wet or too dry right after mixing almost always reaches the right consistency by the time you press it in.

    And press hard. Like, really hard. Use the back of a flat measuring cup or a heavy glass and push down on every inch of the surface. The more compressed your bar, the better it slices and the less it crumbles.

    Which Healthy Homemade Protein Bar Bases Bind Most Reliably

    After testing many combinations, here’s how I’d rank the most common bases by binding reliability.

    1. Peanut butter + honey (most reliable, almost never fails)
    2. Almond butter + maple syrup (close second, slightly softer set)
    3. Coconut oil + dates blended (incredible binder, especially for no-powder recipes)
    4. Sunflower seed butter + agave (works great, slight color shift to greenish from the chlorophyll)
    5. Tahini + honey (great flavor, needs slightly more chilling time)
    6. Coconut butter alone (works but sets very firm, almost brittle)

    Healthy homemade protein bars made with the peanut butter and honey combo are genuinely the most forgiving. I’d always recommend that pairing to anyone who’s had trouble with bars falling apart before.

    Full Storage Guide: Shelf Life Secrets Competitors Never Cover

    Storage is honestly the part most recipe guides rush through. Like, they’ll spend 800 words on ingredients and then say “store in the fridge for a week” and call it done. But there’s actually a lot more to know here, especially if you’re batch-cooking for the whole week or prepping for busy travel days.

    What Is the Best Way to Store Homemade Protein Bars

    The single best storage method I’ve found is wrapping each bar individually in a small piece of parchment paper, then stacking them in an airtight container in the fridge. This does two things: keeps them from sticking to each other, and makes grab-and-go effortless in the morning. You’re not digging through a pile of sticky bars at 6am trying to find one that’s still intact.

    For room temperature storage, bars last about 7-10 days if your recipe doesn’t contain fresh dairy or fruit. Keep them in a cool, dark spot. Not the counter next to the stove where it gets warm. The fat in nut butters can go slightly rancid faster in heat, and nobody wants that.

    For freezer storage, wrap bars in parchment first, then plastic wrap, then into a freezer bag. Label with the date. They’re good for up to 3 months, and they thaw in about 30-45 minutes at room temp. Or eat them straight from the freezer if you like a really dense, cold texture. Honestly kind of addictive that way.

    homemade protein bars in practice

    How Long Do Homemade Protein Bars Actually Stay Fresh

    Here’s the real breakdown, because the answer genuinely varies by recipe type.

    Recipe Type Room Temp Refrigerator Freezer
    Nut butter + oats (no-bake) 7-10 days 2-3 weeks 3 months
    Bars with Greek yogurt 2-3 days 5-7 days 2 months
    Bars with fresh fruit 1-2 days 4-5 days 2 months
    Baked bars (oat-based) 5-7 days 2 weeks 3 months
    Vegan bars (no dairy) 7-10 days 3 weeks 3 months

    If anything smells off, looks moldy, or has changed texture dramatically, throw it out. Higher fat content recipes (more nut butter, more coconut oil) actually preserve better than low-fat versions because fat creates a natural barrier against moisture absorption.

    The One Chilling Trick That Transformed My Homemade Bars Forever

    Okay, I’m almost embarrassed it took me so long to figure this out. Because it’s so simple. And it makes such a dramatic difference in how your homemade protein bars turn out.

    Here’s what happened. I was in a rush one evening and couldn’t wait the full 2 hours for my bars to set in the fridge. So I put them in the freezer instead, just to speed things up. I set a timer for 12 minutes, got distracted by something else, and came back about 15 minutes later.

    And those bars were… incredible. Completely different texture than any batch I’d made before. Dense. Sliceable. Clean edges. Almost like they came out of a professional mold.

    Why Freezing for 12 Minutes Changes the Entire Bar Texture

    The science behind it is actually pretty interesting. When you put your freshly-pressed bars in the freezer for just 10-15 minutes, the fats in the nut butter and coconut oil firm up rapidly instead of setting gradually. This rapid firming creates a more uniform, compressed texture throughout the bar.

    Slow refrigerator chilling allows some movement and settling in the mixture before it fully sets. So you can end up with slightly uneven density across the bar, which is why some parts crumble more than others when you slice. The quick freeze locks everything in place before any of that happens.

    After the 12-minute blast in the freezer, I move the bars to the fridge to finish setting and store. You don’t want them frozen solid. Just that initial rapid chill does all the work.

    How This Discovery Made My No-Bake Bars Taste Store-Bought

    Honestly? I was shocked how much of a difference this made. People I shared bars with started asking if I’d bought them somewhere. My sister thought I’d found a new brand she hadn’t tried. That felt like a pretty solid win for a 12-minute freezer trick.

    The texture becomes almost glossy on the outside (especially if you press chocolate chips into the top surface). The interior stays dense and chewy. And when you slice them, you get clean, sharp edges instead of crumbled messes. It’s literally the best version of homemade protein bars no bake I’ve ever managed to produce, and it costs nothing extra to do.

    ❓ Can I make homemade protein bars without any protein powder at all?

    Yes, absolutely. You can make homemade protein bars without protein powder by leaning on whole food protein sources instead. Nut butters, oats, hemp seeds, chia seeds, and pumpkin seeds all contribute meaningful protein. A bar made with 1 cup peanut butter, 2 cups oats, and 1/4 cup hemp seeds can deliver around 8-10 grams of protein per bar without any powder involved. Dates or honey work as the binder in place of protein powder’s thickening effect.

    FAQ: Everything You Need to Know About Homemade Protein Bars

    How do I make homemade protein bars that actually hold together?

    The key is the right ratio of wet to dry ingredients. Use 1 part nut butter or fat to 2 parts dry ingredients by volume. Add 2-3 tablespoons of honey or maple syrup as extra binding. Press the mixture firmly into a lined pan and refrigerate for at least 2 hours. If bars crumble, add 1-2 tablespoons more nut butter or try the 12-minute freezer trick before slicing.

    What’s the best way to store homemade protein bars?

    Wrap each bar in parchment paper and store in an airtight container in the fridge for up to 3 weeks. For longer storage, freeze individually wrapped bars for up to 3 months. Room temperature storage works for 7-10 days if your recipe has no fresh dairy or fruit. Always label containers with the date made.

    Can I substitute ingredients in homemade protein bar recipes?

    Yes, most substitutions work well. Nut butters swap 1:1, sweeteners swap 1:1 by volume, and protein powders are mostly interchangeable by weight. When replacing oats with almond or coconut flour, use 25% less by volume since both absorb more moisture. Start with half a batch when testing a new substitution so you don’t waste a full batch if the texture is off.

    How long do homemade protein bars stay fresh?

    Standard nut butter and oat bars stay fresh 7-10 days at room temperature, 2-3 weeks refrigerated, and up to 3 months frozen. Bars with fresh fruit or Greek yogurt have shorter lives: 4-7 days refrigerated. Higher fat content recipes generally preserve better. Discard anything with an off smell, visible mold, or dramatic texture change.

    How much protein is in a homemade protein bar?

    A typical batch made with 1 cup protein powder, 1 cup nut butter, and 2 cups oats, cut into 12 bars, yields about 10-13 grams of protein per bar. Oats contribute 2-3g, peanut butter adds 3-4g, and protein powder provides 4-6g per bar. To increase protein per bar, use more protein powder (up to 1.5 cups per batch), add Greek yogurt, or stir in hemp seeds. Homemade bars typically match or beat store-bought in actual protein content.

    What’s the difference between no-bake and baked protein bars?

    No-bake bars take 10-15 minutes of prep and set in the fridge, delivering a fudgy, dense texture. Baked bars take 30-40 minutes total but produce a chewier, cake-like result. No-bake is better for whole food ingredients and busy schedules. Baked bars work well for recipes with higher whey protein content. Both store for similar durations. Choose no-bake for convenience, baked for a more varied chew and texture.

    Final Thoughts on Making Homemade Protein Bars Your Own

    If there’s one thing I want you to take away from all of this, it’s that homemade protein bars are genuinely one of the most flexible, rewarding things you can add to your weekly prep routine. They’re not intimidating once you understand the ratios. They’re not time-consuming once you have a method that works. And they’re absolutely delicious when you dial in your flavor combinations.

    I’ve made probably hundreds of batches at this point, and I still get a little thrill every time a fresh slab comes out of the pan and slices clean. There’s real DIY satisfaction in knowing exactly what’s in your snack, knowing it cost a fraction of the store-bought version, and knowing it was made with ingredients you actually chose.

    Start simple. Peanut butter, oats, protein powder, honey. Nail that base recipe first, then start experimenting with flavors and variations. You’ll figure out your own preferences faster than you think.

    Browse more high-protein meal ideas and simple healthy recipes over on the AliceTasty homepage. And if you’d like to know a little more about who’s behind all these recipes, come say hello on the About Me page. Or if you’ve got a question, a substitution you’re not sure about, or just want to share how your batch turned out, the Contact page is always open.

    The first time I ever made a batch of homemade protein bars, I used way too much protein powder and ended up with something that tasted like chalk pressed into a brick. I almost gave up on the whole idea. But I was tired of spending $40 a month on packaged bars that didn’t even taste that good, so I kept tweaking. The batch I made three weeks later, with better ratios and the 12-minute freezer trick I stumbled onto by accident, was genuinely one of the most satisfying cooking moments I’ve had. It’s one of those recipes that rewards you the more you make it. And once you crack it, you’ll never go back to store-bought.

  • The Ultimate Guide to High Protein Shrimp Recipes: 20 Delicious Ways to Hit Your Macro Goals

    The Ultimate Guide to High Protein Shrimp Recipes: 20 Delicious Ways to Hit Your Macro Goals

    High Protein Shrimp Recipes completely changed how I approach weeknight dinners, and honestly, I wish I’d discovered this sooner. I used to think hitting my protein goals meant choking down plain chicken breast every single day. Boring, repetitive, and kind of demoralizing after a while. Then I started cooking with shrimp seriously, and everything clicked.

    Shrimp cooks in minutes, packs an incredible amount of protein per serving, and takes on flavor like almost nothing else. Whether you’re deep into a fitness routine, trying to lose weight, or just want meals that actually keep you full, shrimp belongs in your weekly rotation. And I’m going to show you exactly how to make it work.

    Quick Answer: High Protein Shrimp Recipes are fast, flexible, and genuinely macro-friendly. Shrimp delivers roughly 20-24g of protein per 3oz serving with under 100 calories, making it one of the best proteins for fitness goals. Most recipes come together in 20 minutes or less, perfect for meal prep or busy weeknight dinners.

    I’ve tested dozens of variations over the past few years, everything from garlic butter skillets to cold shrimp salads to meal-prepped stir fry bowls. Some flopped spectacularly. Others became weekly staples. This guide is everything I’ve learned packed into one place, with real nutritional data, honest tips, and recipes that actually taste like something you’d want to eat.

    If you’re new to cooking shrimp at home, don’t worry. I was nervous my first time too. Overcooked it completely, rubbery little curls that tasted like regret. But once I understood the basics, it became one of the easiest proteins I cook. Let me walk you through all of it.

    For more ideas on building meals around whole, satisfying ingredients, check out my approach to healthy everyday cooking where I break down my overall philosophy on eating well without making it complicated.

    High Protein Shrimp Recipes overview

    Shrimp Packs 24g Protein Per 3oz: Here’s Why It Wins for High Protein Shrimp Recipes

    I remember standing in the grocery store a few years ago, genuinely debating between chicken thighs and a bag of frozen shrimp. The shrimp seemed almost too convenient, like a shortcut that couldn’t possibly be as nutritious. I grabbed the chicken. Classic mistake.

    Turns out, shrimp is one of the most protein-dense foods you can buy. Once I actually looked at the numbers, I started buying shrimp every single week. The protein-to-calorie ratio is genuinely hard to beat.

    How much protein does shrimp have per serving exactly

    A 3oz cooked serving of shrimp delivers around 18-20g of protein and only about 84 calories. Scale up to a generous 4oz portion, which is realistic for a real meal, and you’re looking at roughly 24g of protein for well under 120 calories. That’s remarkable.

    Shrimp is also a complete protein, meaning it contains all nine essential amino acids your body can’t produce on its own. That matters for muscle repair, recovery, and satiety. According to shrimp nutritional profile and health benefits, shrimp also provides significant amounts of selenium, iodine, and omega-3 fatty acids alongside that impressive protein content.

    Here’s a quick comparison to put things in perspective:

    Protein Source Protein per 3oz Calories per 3oz Fat per 3oz
    Shrimp (cooked) 20g 84 0.9g
    Chicken Breast 26g 165 3.6g
    Tilapia 21g 109 2.3g
    Lean Ground Turkey 22g 180 8g
    Eggs (2 large) 12g 143 9.5g

    Why shrimp beats chicken for low calorie high protein meals

    Chicken breast is great. I’m not going to pretend otherwise. But when you’re watching calories and trying to maximize protein, shrimp has a distinct edge. You get nearly the same protein with almost half the calories. That’s not a small difference.

    Shrimp also cooks in literally 3-4 minutes. Chicken breast? You’re looking at 12-15 minutes minimum, and you have to be careful not to dry it out. With shrimp, the margin for error is tighter on one end (overcooking makes it rubbery) but the total active cooking time is so short that it’s actually harder to mess up once you know what to watch for.

    And from a flavor perspective? Shrimp absorbs marinades and sauces sooo fast. A 15-minute marinade on shrimp does what a 4-hour marinade does on chicken. That’s a total game changer for quick high protein shrimp recipes when you’re coming home tired after work.

    💡 Pro Tips:
    • Buy frozen shrimp in bulk. It’s often fresher than “fresh” shrimp at the counter (which was likely previously frozen anyway), and it’s always ready when you need it.
    • Look for shrimp labeled 21/25 or 16/20 on the bag. These numbers refer to shrimp per pound. Larger shrimp are easier to cook without overcooking.
    • Pat shrimp completely dry before cooking. Moisture is the enemy of a good sear. Dry shrimp = better browning = way more flavor.
    • Don’t overcrowd your pan. Cook shrimp in a single layer or they’ll steam instead of sear. Work in batches if needed.

    7 Quick High Protein Shrimp Recipes Ready in 20 Minutes

    These are my actual go-to easy high protein shrimp recipes on nights when I have zero energy and about 25 minutes before I start raiding the pantry for something I’ll regret. Every single one of these has become a real staple in my kitchen, and most of them involve basic pantry ingredients you probably already have.

    How long does it take to cook high protein shrimp recipes

    Most quick high protein shrimp recipes come together in 15-20 minutes from fridge to plate. Shrimp itself takes 2-4 minutes per side in a hot skillet, or about 12 minutes in a 400°F oven. The rest of the time is just prep and whatever sides you’re making.

    Here’s a realistic timing breakdown for the 7 fastest options:

    Recipe Total Time Protein per Serving Difficulty
    Garlic Butter Shrimp Skillet 12 min 28g Beginner
    Lemon Herb Shrimp Bowl 15 min 32g Beginner
    Spicy Shrimp Lettuce Wraps 15 min 25g Beginner
    High Protein Shrimp Stir Fry 18 min 35g Easy
    Shrimp and Egg White Scramble 12 min 38g Beginner
    Shrimp Avocado Salad 10 min 24g Beginner
    Coconut Lime Shrimp 20 min 30g Easy

    Best high protein shrimp stir fry for busy weeknights

    My high protein shrimp stir fry is literally the meal I make when I haven’t planned dinner and it’s already 6pm. It takes about 18 minutes including chopping, and the flavor is genuinely impressive for something that requires almost no effort.

    The base is simple: shrimp, broccoli, snap peas, and bell pepper tossed in a sauce made from low-sodium soy sauce, sesame oil, fresh ginger, and a tiny bit of honey. The ginger-sesame smell when it hits a hot pan? You know that feeling when the whole kitchen smells incredible and you’re suddenly very glad you decided to cook instead of ordering out? That’s this dish.

    Pair it with cauliflower rice to keep it low carb, or regular brown rice if you need the extra carbs around a workout. Either way, you’re hitting 35g of protein per serving without any weird ingredients or complicated technique. Perfect for those Tuesday nights when you have exactly 25 minutes and need something that actually fills you up.

    For a deeper look at balancing protein meals throughout the week, explore more healthy meal ideas on the main site where I share my favorite approachable recipes for every day of the week.

    Every Recipe With Full Nutritional Protein Breakdown Included for High Protein Shrimp Recipes

    One thing that drives me crazy about a lot of recipe sites is the vague “healthy” claim with zero actual data. So here’s my commitment: every approach I recommend comes with real numbers. Not estimates pulled from thin air, but realistic macros based on actual ingredients and portion sizes.

    High Protein Shrimp Recipes in depth

    Healthy high protein shrimp meals with macros per serving

    Healthy high protein shrimp meals can look really different depending on your goals. Someone in a calorie deficit needs different portion structures than someone bulking or maintaining. Here’s how I think about it for different approaches:

    Sample Nutrition Breakdown: Garlic Shrimp Bowl with Quinoa and Roasted Broccoli
    • Calories: 385
    • Protein: 42g
    • Carbohydrates: 28g
    • Fat: 10g
    • Fiber: 5g
    • Sodium: 620mg

    Based on 5oz shrimp, 1/2 cup cooked quinoa, 1 cup broccoli, 1 tbsp olive oil, garlic, and lemon.

    That bowl right there is legitimately one of my favorite weeknight meals. It’s filling, it tastes great, and 42g of protein in one sitting is hard to beat without getting into serious meal complexity.

    The key with high protein shrimp recipes is the pairing. Shrimp alone is protein-rich but not a complete meal. Add a fiber source (vegetables, legumes) and an optional complex carb, and you’ve got something sustainable that keeps hunger away for hours.

    Low carb high protein shrimp recipes under 10g net carbs

    If you’re following keto or just keeping carbs low, shrimp is practically made for you. It has zero carbohydrates on its own. All the carbs in low carb high protein shrimp recipes come from whatever you pair with it, which means you have total control.

    My favorite low-carb combinations:

    • Shrimp and Zucchini Noodles: Around 4g net carbs, 32g protein
    • Garlic Butter Shrimp over Cauliflower Rice: 6g net carbs, 35g protein
    • Spicy Shrimp Lettuce Cups: 3g net carbs, 26g protein
    • Shrimp Caesar Salad (no croutons): 5g net carbs, 30g protein
    • Lemon Pepper Shrimp with Sauteed Spinach: 2g net carbs, 28g protein

    Honestly, these options are so satisfying that I eat them even on days when I’m not restricting carbs. The cauliflower rice bowl especially, I was skeptical the first time I made it, but it’s sooo good. No one I’ve fed it to has complained about missing regular rice.

    💡 Pro Tips:
    • For keto shrimp meals, use ghee or avocado oil for cooking. Both have high smoke points and add richness without extra carbs.
    • Cauliflower rice absorbs shrimp pan juices beautifully. Add it directly to the skillet after removing the shrimp and let it soak up all that garlicky goodness.
    • Zucchini noodles release water as they cook. Salt them first, let them sit 10 minutes, then squeeze out the moisture before adding shrimp. This prevents a watery dish.

    High Protein Shrimp Pasta That Hits 40g Protein Per Bowl

    Okay so this is the section I get the most questions about. Because pasta and “high protein” don’t always go hand in hand in people’s minds. But high protein shrimp pasta is completely achievable, and when it’s done right, it’s literally the best version of a comfort meal I’ve tried that still fits my macros.

    The first time I made shrimp pasta for meal prep, I accidentally used twice as much pasta as intended because I eyeballed it. Still tasted amazing, just slightly less macro-friendly than planned. I served it anyway. Worth it.

    What sides pair best with high protein shrimp recipes

    Pairing matters a lot for both nutrition and satisfaction. When I’m building a plate around easy high protein shrimp recipes, I think about three components: the shrimp (protein), a vegetable (fiber and volume), and an optional starch (energy and satiety).

    Best sides by dietary goal:

    • Weight loss focus: Roasted broccoli, sauteed spinach, arugula salad, steamed asparagus
    • Muscle building: Brown rice, sweet potato, quinoa, whole grain farro
    • Keto: Cauliflower rice, zucchini noodles, garlic butter green beans, avocado slices
    • Mediterranean: Whole wheat couscous, roasted cherry tomatoes, cucumber salad
    • General fitness: Mixed roasted vegetables, wild rice, lentil salad

    Acidic elements like fresh lemon juice or a splash of white wine vinegar are genuinely underrated with shrimp. They cut through richness, brighten everything, and make the whole dish taste more restaurant-quality with zero extra calories.

    Swapping regular pasta to double the protein without sacrificing taste

    This is the move that changed my high protein shrimp pasta game completely. Regular spaghetti delivers about 7-8g of protein per serving. Chickpea pasta? Around 14-15g. Edamame pasta? Up to 24g. Just from the pasta itself.

    Swap regular pasta for chickpea or lentil pasta, add 5oz of shrimp, maybe throw in some white beans or a scoop of ricotta to the sauce, and you can genuinely hit 40g of protein in a single bowl. Without it feeling like a sad diet meal. It tastes like pasta. Because it is pasta.

    I was not sure this would actually work when I first tried it, but the chickpea pasta texture is really close to regular pasta when cooked al dente. Don’t overcook it, that’s the main thing. Al dente is non-negotiable. Mushy chickpea pasta is a different (disappointing) experience.

    Meal Prep 5 Days of Shrimp Protein in Under 45 Minutes for High Protein Shrimp Recipes

    Sunday meal prep is something I’ve done consistently for about three years now, and I’ll be honest, it took me a while to figure out how to include shrimp without everything getting rubbery by Wednesday. Now I’ve got a system that works really well, and I want to share exactly what I do.

    High Protein Shrimp Recipes in practice

    Can I prepare high protein shrimp recipes in advance for meal prep

    Yes, absolutely. Shrimp is one of the better proteins for meal prep once you know a few key tricks. Cooked shrimp keeps well in the fridge for 3-4 days in an airtight container. The main rule: store shrimp separately from sauces whenever possible, and combine right before eating.

    Here’s my 45-minute Sunday shrimp prep session:

    1. Minutes 0-10: Thaw and dry 2 lbs of shrimp, mix two different marinades (one garlic-lemon, one spicy-sesame)
    2. Minutes 10-15: Cook the first marinade batch in a hot skillet, 2 minutes per side, set aside
    3. Minutes 15-20: Cook the second batch. You now have two totally different flavor profiles from the same protein.
    4. Minutes 20-35: Roast vegetables at 425°F (broccoli, bell peppers, asparagus), cook brown rice or cauliflower rice
    5. Minutes 35-45: Portion into five containers, store sauces separately

    That’s 5 lunches or dinners handled for the week, with variety so you’re not eating the exact same thing every day. That’s one of the things I genuinely love about high protein shrimp recipes for meal prep: the flexibility.

    Storage and reheating tricks that keep shrimp tender all week

    Reheating shrimp is honestly where most people go wrong. Microwave it too long and it turns into rubbery little erasers. Here’s what actually works:

    • In the microwave: Add 1-2 tablespoons of water or broth to the container before microwaving. Heat in 30-second bursts until just warmed through, not more. 60 seconds total is usually enough.
    • In a skillet: Medium-low heat, add a tiny bit of water or sauce, toss for 1-2 minutes. This is my preferred method. Much better texture.
    • Cold: Don’t overlook this option. Cold cooked shrimp over a salad or in a wrap is genuinely delicious and requires zero reheating. High protein shrimp salad made this way is one of my favorite fast lunches.

    For freezing: cooked shrimp freezes well for up to 3 months in freezer bags. Lay flat, remove as much air as possible, and thaw overnight in the fridge before using. Never thaw at room temperature, and please don’t microwave-thaw cooked shrimp. Just trust me on that one.

    To get more meal prep inspiration and ideas for building a week of balanced eating, read more on how I structure my healthy meal planning approach with simple systems that actually stick.

    The One Marinade Trick That Triples Shrimp Flavor in High Protein Shrimp Recipes

    Okay, here’s the thing I wish someone had told me years ago. The reason restaurant shrimp tastes so much better than home-cooked shrimp isn’t a secret ingredient or professional equipment. It’s acid. Specifically, the balance between fat, acid, and salt in the marinade, and the timing of when you apply it.

    Shrimp should marinate for a maximum of 15-30 minutes before cooking. That sounds counterintuitive if you’re used to overnight chicken marinades. But acid (lemon juice, lime, vinegar) actually starts to chemically “cook” shrimp if you leave it too long. You’ll end up with mushy, textureless shrimp before it even hits the heat. I learned this the hard way with a ceviche experiment that went about 2 hours too long.

    The perfect marinade ratio I use for virtually every variation of quick high protein shrimp recipes:

    • 2 tablespoons oil (olive or avocado)
    • 1 tablespoon acid (lemon juice, lime juice, or rice vinegar)
    • 1 teaspoon salt
    • 2-3 cloves garlic, minced
    • Your spice profile of choice (paprika, cumin, chili flakes, Italian herbs, etc.)

    That base works for literally any cuisine direction you want to go. Mediterranean, Asian-inspired, Mexican, classic American. Just swap the spices. The protein absorption improves too, because the fat helps carry fat-soluble nutrients into the shrimp. Not by a dramatic percentage, but meaningfully enough to matter over weeks of consistent eating.

    What are the best substitutes for shrimp in high protein recipes

    Sometimes shrimp isn’t available, or you’ve already had it three times this week and need a break. Here are the best swaps that keep the spirit of healthy high protein shrimp meals intact:

    • Scallops: Best direct swap. Similar cooking time, similar protein content (20g per 3oz), excellent texture. More expensive but worth it occasionally.
    • Cod or mahi-mahi: Great for baked or pan-seared preparations. Around 20-22g protein per 3oz. Slightly longer cook time.
    • Chicken breast: More protein (26g per 3oz) but longer cooking time. Use thin-cut for speed.
    • Firm tofu: About 17g protein per serving. Needs pressing and a bolder marinade to shine, but works well in stir fry applications.
    • Canned tuna or salmon: Fast, convenient, and protein-packed. Different texture but works in salad-style preparations.

    Is shrimp safe to eat for people with seafood allergies

    This is an important one. Shrimp is a crustacean shellfish and is one of the most common food allergens in the United States. If you have a known shellfish allergy, shrimp is not safe, full stop.

    It’s worth knowing that shellfish allergies and finfish allergies are distinct. Someone allergic to salmon or tuna may tolerate shrimp, and vice versa. But someone allergic to other crustaceans like crab or lobster is very likely to react to shrimp too, since they share similar proteins.

    If you’re uncertain about your allergy status, please consult an allergist before experimenting. Cross-contamination in shared kitchen spaces is also a real concern. For anyone who needs to avoid shrimp entirely, all the high protein recipes in this guide can be adapted with the substitutes listed above without losing much in the way of nutrition or convenience.

    Shrimp is the most consumed seafood in the United States, with Americans eating an average of 4 pounds per person per year. Its popularity surged particularly during the holiday months of November and December, when shrimp cocktail and shrimp-based party dishes become staples on celebration tables across the country.

    Conclusion: Your Starting Point for High Protein Shrimp Recipes

    If there’s one thing I want you to take away from this guide, it’s that high protein shrimp recipes are genuinely one of the most practical tools in a health-conscious kitchen. Fast, flexible, nutritious, and actually delicious. That combination is rare.

    Start simple. Pick one recipe from the 20-minute list, get comfortable with the cooking technique, and build from there. Before long, you’ll have a rotating set of shrimp meals that feel automatic, because that’s exactly how sustainable eating habits get built. Small wins, repeated consistently.

    Shrimp has genuinely earned a permanent spot in my weekly meal rotation, and I think once you try a few of these approaches, it’ll earn one in yours too. Especially heading into the holiday months when you want food that feels celebratory but doesn’t derail your goals entirely.

    Browse more delicious recipes and healthy meal ideas at alicetasty.com, and feel free to learn more about who I am and why I started this site on my About Me page. If you have questions, a recipe you’d like to see, or just want to say hi, I’m always happy to hear from you through my Contact page.

    I started seriously experimenting with shrimp about three years ago when I was trying to hit 130g of protein daily without eating the same three foods on repeat. Honestly, my first few attempts were pretty rough. I overcooked shrimp constantly, made it rubbery, and once served what I can only describe as “pink rubber bands in garlic sauce” to my partner who was very polite about it. But I kept at it. I read everything I could about technique, tested timing obsessively, and eventually figured out the exact cooking window that keeps shrimp tender and flavorful every time. Now I cook shrimp at least twice a week, and it’s become genuinely one of my favorite proteins to work with. The nutritional profile, the speed, the versatility. I couldn’t create a site about healthy eating and not make shrimp a central part of it.

    ❓ Can I use frozen shrimp straight from the freezer without thawing first?

    Yes, you can cook shrimp directly from frozen, though the results are slightly better with thawed shrimp. If using frozen directly, run them under cold water for 1-2 minutes to partially thaw, pat dry, and add about 2-3 minutes to your cooking time. Never cook frozen shrimp in a crowded pan or you’ll end up steaming instead of searing, which significantly affects flavor and texture.

    Frequently Asked Questions About High Protein Shrimp Recipes

    How much protein does shrimp have per serving?

    Shrimp contains approximately 20-24 grams of protein per 3.5oz cooked serving, with only around 99 calories. A standard 3oz portion delivers roughly 18-20g of protein. Shrimp is a complete protein containing all nine essential amino acids, and it’s extremely low in fat (under 1g per serving) with virtually zero carbohydrates. This makes it ideal for keto, paleo, and low-carb diets and gives it one of the best protein-to-calorie ratios of any food.

    Can I prepare high protein shrimp recipes in advance for meal prep?

    Absolutely. Cooked shrimp stays good in the refrigerator for 3-4 days in an airtight container. For best results, store shrimp separate from sauces and combine right before eating to maintain texture. Many preparations like shrimp salad work great cold. You can also freeze cooked shrimp for up to 3 months. Raw shrimp freezes for up to 6 months, giving you the flexibility to cook fresh batches throughout the week.

    What are the best substitutes for shrimp in high protein recipes?

    Scallops are the best direct substitute with similar protein content (20g per serving) and the same quick cooking time. Cod or mahi-mahi work well for baked or pan-seared recipes. Chicken breast offers more protein (26g per 3oz) but requires longer cooking. For plant-based options, firm tofu provides around 17g per serving and works well in stir-fry applications. Canned tuna or salmon are convenient swaps for cold or salad-style preparations.

    How long does it take to cook high protein shrimp recipes?

    Most high protein shrimp recipes are ready in 15-25 minutes total including prep. Shrimp itself cooks in just 2-4 minutes per side in a hot skillet, 3-4 minutes when stir-fried, or 12-15 minutes when baked at 400°F. This makes shrimp the fastest high-protein option available. Even frozen shrimp can be cooked without full thawing by adding just a couple extra minutes to the cook time.

    What sides pair best with high protein shrimp recipes?

    The best pairings depend on your dietary goals. For weight loss, roasted broccoli, sauteed spinach, or arugula salads add fiber and volume with minimal calories. For muscle building, brown rice, quinoa, or sweet potato complement the shrimp protein well. Keto approaches pair shrimp with cauliflower rice or zucchini noodles. Mediterranean-style meals work beautifully with whole grain farro or couscous. Acidic sides like lemon sauce or tomato preparations brighten shrimp flavor significantly.

    Is shrimp safe to eat for people with seafood allergies?

    Shrimp is a crustacean shellfish and a major food allergen, so it is not safe for people with shellfish allergies. Shellfish allergies are distinct from finfish allergies, meaning someone allergic to salmon may tolerate shrimp, though cross-reactivity can occur with other crustaceans like crab and lobster. If you’re unsure about your allergy status, consult an allergist before consuming shrimp. All the recipes in this guide can be adapted using chicken, turkey, tofu, or white fish for those who need to avoid shellfish.

  • 7 High Protein Chicken Bowl Ideas That Make Healthy Eating Genuinely Exciting

    7 High Protein Chicken Bowl Ideas That Make Healthy Eating Genuinely Exciting

    A High Protein Chicken Bowl changed the way I eat on busy weeknights, and honestly? I didn’t see that coming. I remember standing in my kitchen last November, exhausted after a long day, staring at a sad container of leftover rice and thinking, there has to be a better way to eat healthy without dreading every meal. That bowl I threw together out of desperation turned into the foundation of how I meal prep today.

    Quick Answer: A High Protein Chicken Bowl is a delicious, easy-to-make dish perfect for weeknight dinners. Layer a grain base, seasoned chicken breast, and protein-rich toppings to hit 40-50g of protein per serving. Most versions come together in under 30 minutes and store beautifully for up to 4 days in the fridge.

    These bowls aren’t just a trend. They’re one of the most practical, satisfying, and genuinely flexible meals you can build for a fitness-focused lifestyle. Whether you’re cutting, maintaining, or just trying to eat cleaner this holiday season, this guide covers every angle you need.

    I’ve been making versions of this meal for years, and I’ve burned chicken, under-seasoned rice, and assembled some truly tragic combinations along the way. So trust me when I say, I’ve done the trial and error so you don’t have to.

    High Protein Chicken Bowl overview

    Why High Protein Chicken Bowls Dominate Every Fitness Meal Plan

    Ask any personal trainer, registered dietitian, or gym regular what they eat most consistently, and a high protein chicken bowl is almost always in the rotation. There’s a reason for that. It’s not hype. These bowls genuinely deliver on every front that matters for people trying to stay fit, lose fat, or just feel good in their body.

    I started seeing real results in my own energy levels when I switched from grab-and-go sandwiches to building intentional bowls. The difference wasn’t just physical. I stopped feeling that 3pm crash. I stopped reaching for snacks an hour after lunch. The satiety from a well-built protein bowl is just… different.

    And for anyone who’s tried to eat healthy during Thanksgiving or Christmas, having a go-to high protein meal prep option is a total game changer. You’re not white-knuckling your way through the holidays, you’re actually fueled and satisfied.

    What Makes Chicken Bowls the Ultimate High Protein Meal Choice

    Chicken breast is one of the leanest, most accessible protein sources on the planet. A 4-oz serving delivers roughly 26g of protein with barely 1g of fat. That’s an incredible macro ratio for anyone watching their intake.

    But what makes the bowl format so powerful isn’t just the chicken. It’s the layering. You’re stacking macros intentionally, protein from the chicken, complex carbs from the grain base, fiber from vegetables, and healthy fat from a topping like avocado or a drizzle of tahini. Everything works together. Nothing is wasted.

    It’s also infinitely customizable. That matters more than people realize. When a meal fits your taste, you actually eat it consistently. Consistency is where results happen, not perfection.

    How a Single Bowl Can Hit 50g of Protein Without Supplements

    50 grams of protein in one meal sounds like a lot. And without powders or shakes, it might seem impossible. But it’s genuinely not, especially once you understand how protein stacks.

    Here’s a real example I use myself. Start with 5 oz of grilled chicken breast (about 33g protein). Add half a cup of cooked quinoa (4g protein). Throw on a quarter cup of black beans (4g protein). Top with two tablespoons of Greek yogurt-based dressing (3-5g protein). You’re already sitting at roughly 44-46g, without even counting the vegetables.

    Add a soft-boiled egg on top and you’re at 52g. Easy. No supplements. No tricks. Just whole food, layered smart. If you’re new to building meals like this, check out more healthy recipe ideas on the homepage to get started with simple foundations.

    The Exact Macro Breakdown Fitness Enthusiasts Actually Need in Every Bowl

    Knowing your macros sounds complicated. I used to avoid it entirely because the math felt overwhelming. But once I started actually tracking, even loosely, everything clicked. I stopped guessing and started seeing results.

    The key insight? A healthy high protein chicken bowl hits different goals depending on how you build it. The base ingredients stay mostly the same. What changes is the portion size and what you add on top.

    Calories, Protein, Carbs and Fat Counted Per Ingredient

    Here’s the breakdown I use as a starting reference when building my own bowls:

    Ingredient Serving Size Calories Protein Carbs Fat
    Chicken breast (grilled) 5 oz 165 33g 0g 3g
    Brown rice (cooked) 1/2 cup 108 3g 22g 1g
    Black beans (cooked) 1/4 cup 57 4g 10g 0g
    Quinoa (cooked) 1/2 cup 111 4g 20g 2g
    Avocado (sliced) 1/4 whole 58 1g 3g 5g
    Greek yogurt dressing 2 tbsp 25 3g 2g 0g

    According to Harvard T.H. Chan School of Public Health protein intake guidelines, most active adults benefit from 1.2-1.6g of protein per kilogram of body weight. A well-built bowl can cover a significant portion of that daily need in one sitting.

    How to Adjust Macros for Cutting, Bulking or Maintenance Goals

    This is where the bowl format really shines. Same core meal, totally different macros, just by adjusting a few things.

    Cutting (fat loss focus): Drop the rice portion to 1/3 cup, skip the avocado, and use a lemon-herb drizzle instead of a creamy dressing. You’ll land around 380-420 calories with 45-50g protein. That’s a genuinely powerful high protein chicken bowl for weight loss.

    Bulking (muscle gain focus): Double the rice, add a full egg, and use 6 oz of chicken. Throw in some cottage cheese on the side. You’re pushing 650-700 calories with 55-60g protein. Still clean. Still whole food.

    Maintenance: Follow the base table above almost exactly. Around 520 calories, 48g protein. Simple and repeatable.

    💡 Pro Tips:
    • Weigh your chicken raw, not cooked, chicken loses about 25% of its weight after cooking, so raw measurements are more accurate for macro tracking.
    • Batch cook your grains on Sunday. Rice and quinoa both store well for 5 days and save you 15 minutes every single night.
    • Use a food scale for at least the first two weeks. You’ll be shocked how different a “half cup” looks versus what you’ve been serving yourself.
    • Frozen edamame is a secret protein weapon, 9g per half cup, no cooking required beyond a microwave rinse.
    • If your bowl feels boring, the problem is usually the marinade, not the ingredients.

    Best Ingredients for a High Protein Chicken Bowl That Actually Tastes Good

    Here’s something I had to learn the hard way: a bowl with great macros but terrible flavor is a bowl you’ll make exactly once. And then you’ll go back to ordering takeout. So flavor matters just as much as the numbers.

    The first time I tried to build a truly clean high protein chicken bowl with rice, I used plain steamed chicken, unseasoned brown rice, and raw spinach. It tasted like a punishment. I literally ate it standing over the sink because I couldn’t bring myself to sit down with it.

    So, let’s do this right.

    Which Protein Sources Stack Best With Chicken for Maximum Gains

    Chicken is your anchor. But layering in secondary protein sources is what pushes you past 40g without adding a ton of extra calories.

    • Black beans or chickpeas: 4-7g protein per quarter cup, tons of fiber, and they absorb whatever sauce you’re using beautifully.
    • Soft-boiled egg: 6g protein, rich yolk adds creaminess, and it makes the bowl feel more luxurious.
    • Edamame: 9g per half cup, mild flavor, pairs well with Asian-style marinades.
    • Cottage cheese: Sounds weird in a bowl, but a small scoop on top of warm chicken melts slightly and adds a creamy texture with 10-12g protein per half cup.
    • Greek yogurt-based dressings: The dressing does double duty, it’s both flavor AND protein.

    You don’t need all of these in one bowl. Pick one or two secondary sources that match your flavor theme and you’re set.

    Top Base and Topping Combos That Keep Calories in Check

    The base is where a lot of people accidentally overdo it. A full cup of rice before adding anything else can already be 200+ calories. Here’s how I approach it.

    For a lighter, lower-calorie healthy high protein chicken bowl, I love combining half cauliflower rice and half brown rice. You get the bulk and satiety of a full cup of base, but the total carb count stays manageable. It sounds like a compromise but honestly, once the chicken and sauce are on top, you barely notice.

    For toppings that add volume without calories: shredded cabbage, sliced cucumber, cherry tomatoes, pickled onions, and fresh herbs like cilantro or parsley. These bring crunch, brightness, and color, all without meaningfully changing your macros.

    And fat toppings? Keep it to one per bowl. Either avocado, a drizzle of olive oil, or a tablespoon of nut butter in the sauce. Don’t double up. That’s where bowls quietly become calorie-dense without you realizing it.

    High Protein Chicken Bowl in depth

    Build Your Easy High Protein Chicken Bowl in Under 30 Minutes

    The 30-minute thing is real. I know a lot of recipes claim that and then quietly require 45 minutes of prep you somehow didn’t account for. So I’m being specific here, this is achievable on a Tuesday night when you have exactly 28 minutes before your brain turns off.

    The secret is parallel cooking. While your chicken is in the pan, your grain is heating, your vegetables are being chopped, and your sauce is being stirred. Nothing waits for anything else.

    How Long Does It Actually Take to Make a High Protein Chicken Bowl

    Realistic breakdown:

    Step Time Notes
    Marinate chicken (quick version) 5 min Even 10 min rest time helps
    Cook chicken in pan 10-12 min 5-6 min per side on medium-high
    Heat pre-cooked grain 2-3 min Microwave if using meal-prepped rice
    Chop toppings and make sauce 5-7 min Do this while chicken cooks
    Assemble bowl 2 min Layer intentionally
    Total ~25 min With pre-cooked grains

    If you’re cooking the grain from scratch, add another 15-20 minutes. That’s why I always recommend having rice or quinoa batch-cooked and ready to go. It genuinely transforms this from a 45-minute dinner into a quick weeknight win. For more meal ideas that work around a real schedule, take a look at how this site got started.

    Beginner-Proof Assembly Order for Perfect Texture Every Single Time

    Order matters more than most people think. If you put the sauce on first and the chicken on top, everything gets soggy by the time you’re halfway through. Here’s the assembly sequence I always use:

    1. Grain base first, warm rice or quinoa fills the bottom of the bowl.
    2. Leafy greens next (if using), place them slightly to the side so they don’t wilt completely under the heat.
    3. Beans or secondary protein, nestle them in.
    4. Chicken on top, sliced or cubed, placed intentionally so every bite gets some.
    5. Crunchy toppings, cucumber, cabbage, pickled onion, these go on last to stay crisp.
    6. Sauce drizzled over everything, not pooling at the bottom.
    7. Fresh herbs and seeds, sesame seeds, cilantro, scallions, the finishing touch.

    That’s it. Follow that order and your bowl will look and taste like something you’d pay $18 for at a fast-casual spot.

    💡 Pro Tips:
    • Always let your chicken rest for 3-5 minutes after cooking before slicing. It keeps the juices inside and makes every bite noticeably more tender.
    • If your sauce is too thick, thin it with a tablespoon of water or lime juice, never oil, to keep calories down.
    • Pre-portion your toppings in small containers on meal prep day. Assembly on busy nights becomes literally 3 minutes.

    High Protein Chicken Bowl Meal Prep That Lasts All Week Long

    This is where the easy high protein chicken bowl format really earns its place in a fitness lifestyle. One solid Sunday prep session and you’re eating well every single day, even when life gets chaotic.

    I started doing this during December a couple of years ago because I knew holiday social events would make daily cooking impossible. I prepped five bowls on a Sunday afternoon, kept them in the fridge, and genuinely ate better that entire week than I had in months. No impulse takeout. No skipped lunches. Just consistent, satisfying meals.

    Can You Make a High Protein Chicken Bowl Ahead of Time Safely

    Yes, absolutely. And with a few smart strategies, they stay fresh, flavorful, and texturally great for up to 4 days.

    The main thing to understand is that some components hold better than others. Cooked chicken, grains, beans, and roasted vegetables all store perfectly. Raw crunchy toppings and sauce should be stored separately and added right before eating. That’s the only real rule.

    Avocado is the one exception, it oxidizes fast. Either add it fresh daily, or toss sliced avocado in a tiny bit of lime juice before storing to slow browning. It works reasonably well for up to 2 days that way.

    Exact Storage Containers and Fridge Timelines to Prevent Soggy Bowls

    Not all containers are created equal for high protein chicken bowl meal prep. Glass containers with tight lids are my go-to. They don’t absorb odors, they reheat evenly, and you can see exactly what you’ve got without opening anything.

    Here’s my personal storage system:

    • Main bowl components (chicken, grain, beans, roasted veg): Stored together in a 3-cup glass container. Lasts 4 days in the fridge.
    • Sauce: Stored in a small 2-oz container or mason jar. Add right before eating.
    • Crunchy toppings (cucumber, cabbage, seeds): Stored in a separate small zip bag or container.
    • Fresh herbs: Wrap in a slightly damp paper towel and store in a zip bag. Stays fresh 4-5 days.

    Reheat the base components for 90 seconds in the microwave, then build on top with the cold toppings and sauce. The contrast of warm chicken and grain with crisp, cool vegetables is actually part of what makes this meal so satisfying. Don’t skip it.

    Approximate Nutrition Per Bowl (Standard Build)
    • Calories: ~520
    • Protein: ~48g
    • Carbohydrates: ~42g
    • Fat: ~10g
    • Fiber: ~8g

    Values are estimates based on a 5 oz chicken breast, 1/2 cup brown rice, 1/4 cup black beans, 1/4 avocado, and 2 tbsp Greek yogurt dressing.

    The One Marinade Trick That Triples Flavor in Every High Protein Chicken Bowl

    Okay, this is the part I’m most excited to share. Because this single technique transformed my bowls from “fine, I’ll eat it” to genuinely looking forward to lunch. Every time.

    I almost gave up on making chicken at home for a while. No matter what I did, it tasted dry and flat. I was over-cooking it out of fear, and under-seasoning it out of habit. The marinade was the missing piece, specifically, the acid in the marinade.

    High Protein Chicken Bowl in practice

    Why Acidic Marinades Unlock Juicier Chicken Every Single Cook

    Acid (from lemon juice, lime juice, apple cider vinegar, or even plain yogurt) does two things to chicken. It begins to break down the surface proteins, which allows seasoning to penetrate deeper. And it helps retain moisture during cooking so you don’t end up with that chalky, dry texture that makes clean eating feel like a chore.

    My go-to quick marinade for a high protein chicken bowl with rice or quinoa is laughably simple: 2 tablespoons of lemon juice, 1 tablespoon olive oil, 1 teaspoon garlic powder, half a teaspoon of cumin, salt, and pepper. Mix it in the bag with the chicken, let it sit while you prep everything else (even 10-15 minutes makes a real difference), and cook.

    The result smells incredible in the pan. You know that feeling when the whole kitchen fills up with garlic and citrus and something just starts to smell like a real meal? That’s it. That’s the moment.

    How This Secret Step Makes Weight Loss Bowls Actually Enjoyable

    Here’s what nobody talks about enough: the psychological side of eating well. If your food tastes great, you don’t feel deprived. And when you don’t feel deprived, you stick to your plan. That’s the whole thing.

    A well-marinated, properly seared high protein chicken bowl for weight loss doesn’t feel like diet food. It feels like a restaurant meal you made yourself. And that pride, that satisfaction, is what keeps you consistent for weeks and months instead of days.

    I’ve shared this marinade with several friends who were struggling with meal prep burnout. Every single one came back saying it changed how they felt about cooking healthy. One of them told me she stopped ordering from her usual healthy meal delivery service because she’d rather make her own now. That made my entire week.

    If you want to keep building on this momentum, browse the full collection of healthy recipes for more ideas that fit right into a fitness-focused routine.

    ❓ Can I use chicken thighs instead of chicken breast in a high protein chicken bowl?

    Yes, you definitely can. Chicken thighs have slightly more fat (around 7-9g per 4 oz versus 1-2g for breast) but they’re also more forgiving to cook and harder to dry out. The protein content is close, about 22-24g per 4 oz. If you’re in a cutting phase and tracking fat closely, breast is the better choice. But for maintenance or bulking, thighs add great flavor and are honestly more beginner-friendly.

    Frequently Asked Questions About High Protein Chicken Bowls

    How long does it take to make a High Protein Chicken Bowl?

    With pre-cooked grains, you’re looking at about 20-25 minutes total. Cooking the chicken takes 10-12 minutes in a pan, and everything else comes together while that’s happening. If you’re starting from scratch with dry rice or quinoa, budget closer to 40-45 minutes. That’s exactly why batch cooking your grains on the weekend saves so much time during the week.

    Can I make a High Protein Chicken Bowl ahead of time?

    Yes, most components can be prepped 4 days in advance without any quality issues. Cook your chicken, grains, and beans together, and store them in airtight glass containers. Keep your sauce, fresh herbs, and crunchy toppings separate and add them right before eating. This keeps textures right and flavors bright throughout the week.

    What are the best ingredients for a High Protein Chicken Bowl?

    Fresh, high-quality ingredients always produce the best results. For protein, grilled or pan-seared chicken breast is the anchor, with black beans, edamame, or a soft-boiled egg as great secondary additions. For the base, brown rice, quinoa, or a cauliflower rice blend all work well. Toppings like avocado, pickled onions, shredded cabbage, and a Greek yogurt-based sauce round everything out beautifully.

    How much protein is in a typical High Protein Chicken Bowl?

    A standard bowl with 5 oz of grilled chicken breast, half a cup of quinoa, and a quarter cup of black beans lands around 40-48g of protein before any additional toppings. Adding a soft-boiled egg or cottage cheese can push that number past 50g easily. This makes it one of the most effective high-protein meals you can build from whole foods alone.

    Is a High Protein Chicken Bowl good for weight loss?

    It’s genuinely one of the best meal formats for fat loss. High protein keeps you full longer, which reduces overall calorie intake throughout the day. The bowl format also makes portion control visual and intuitive. By keeping the grain base moderate and loading up on volume from non-starchy vegetables, you can create a satisfying meal under 450 calories that still delivers 45+ grams of protein.

    What sauce goes well with a High Protein Chicken Bowl?

    The best sauces are protein-forward and not overly calorie-dense. A Greek yogurt-based garlic herb sauce, a tahini-lemon drizzle, or a light soy-sesame dressing all work beautifully. For weight loss specifically, avoid heavy cream-based or oil-heavy sauces, they can add 150-200 calories without meaningfully increasing fullness.

    I’ve been building protein bowls seriously for about three years now, and the version I kept coming back to after all the experimenting is genuinely simple. The first time I tried tracking my macros alongside my bowl builds, I was shocked, I had been under-eating protein for years while thinking I was eating healthy. That realization changed everything. I went from hitting maybe 70g of protein daily to consistently landing at 130g+, and the difference in how I felt, how I recovered after workouts, and how stable my energy was throughout the day was night and day. The bowl format made it repeatable without being tedious. That’s what I care about most: meals that work in real life, not just on paper.

    Conclusion

    A High Protein Chicken Bowl is one of those rare meals that genuinely does it all. It’s filling, flexible, fast, and, when you build it right, actually delicious. Not in a “this is healthy so I’ll tolerate it” way. In a real, looks-forward-to-lunch kind of way.

    Whether you’re using this as a weight loss tool with careful macro tracking, a bulk-phase protein anchor, or just a reliable dinner when the week gets hectic, this bowl format will not let you down. Build it once and you’ll understand why it dominates so many fitness meal plans.

    And if you’re just getting started with eating for your goals, know that it doesn’t have to be complicated. A High Protein Chicken Bowl is genuinely one of the most approachable entry points into intentional, satisfying healthy eating there is.

    Browse more delicious healthy recipe ideas at AliceTasty.com, and if you’d like to know more about who’s behind all of this, visit my About Me page. Have a question or just want to share how your bowl turned out? I’d genuinely love to hear from you through the Contact page.

  • Hello world!

    Welcome to WordPress. This is your first post. Edit or delete it, then start writing!